How to use Optimized Storage in macOS
[ad_1]
Apple’s laptops rely on flash storage, and prices really shoot up if you want more local storage (the actual storage on your computer)—if the model you want offers an upgrade in the first place. The Optimized Storage feature in macOS is designed to help free up precious storage space on your Mac.
Optimized Storage requires iCloud, Apple’s online service. Apple provides 5GB of free iCloud Drive storage per Apple ID, so you may want more to take full advantage of Optimized Storage. iCloud storage pricing as follows: 5GB for free; 50GB for $1 per month; 200GB for $3 per month; 2TB for $10 per month. Apple has instructions on how to buy more iCloud storage.
To access the Optimized Storage options in macOS:
- Go to Apple menu > About This Mac.
- In the window that appears, click on the Storage tab, then click Manage.
IDG
This bar graph has changed a bit from the one in OS X El Capitan, which provided a color-coded key below the bar to tell you how your storage is being allocated. Now, the color-coded key is gone, but if you move your cursor over the colored sections, you can see what each section represents.
Below is the main interface for Optimized Storage. First, let’s go over the choices in the Recommendations window that appears in the main section. Then let’s look at the options in the left column.
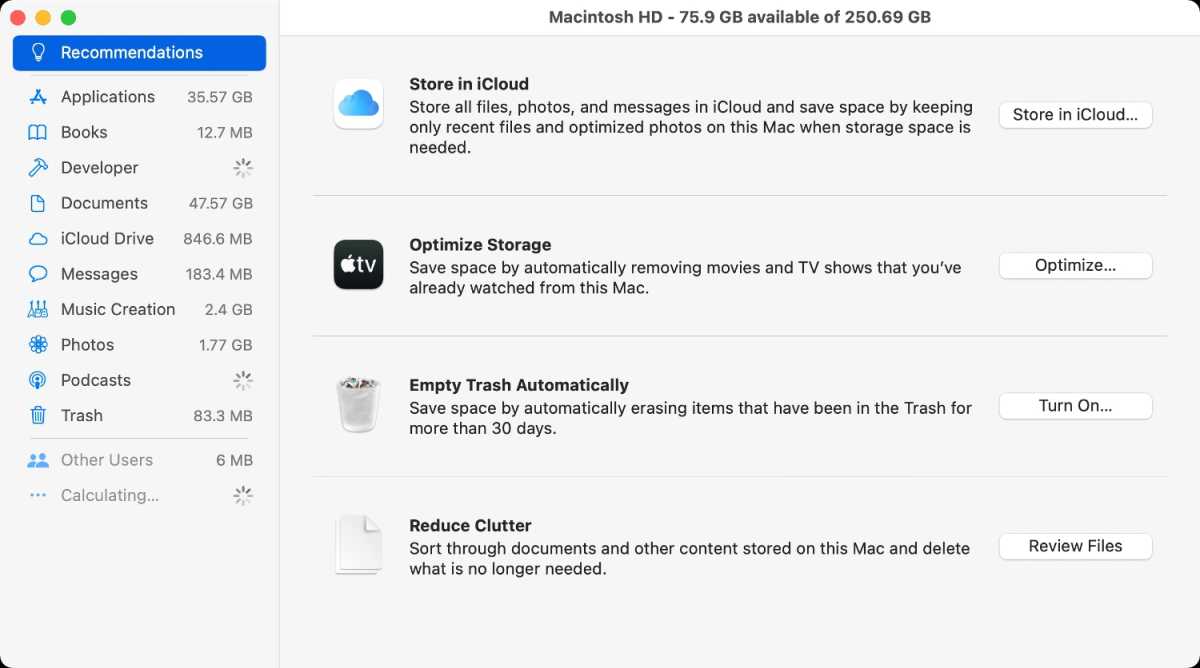
The main window for Optimized Storage.
IDG
Option 1: Store in iCloud
This option houses your most recently used files and optimized photos in local storage. Here’s why you might want to upgrade iCloud: Your iCloud Drive is used as long-term storage for your original files and full-resolution photos and videos, which can be downloaded to your Mac when you need them.
You are able to fine-tune this option a little. When you click on the Store in iCloud button, you have the choice to save files from the Desktop and Documents folders in iCloud. You can also enable/disable the ability to store photos and videos in iCloud Photo Library.
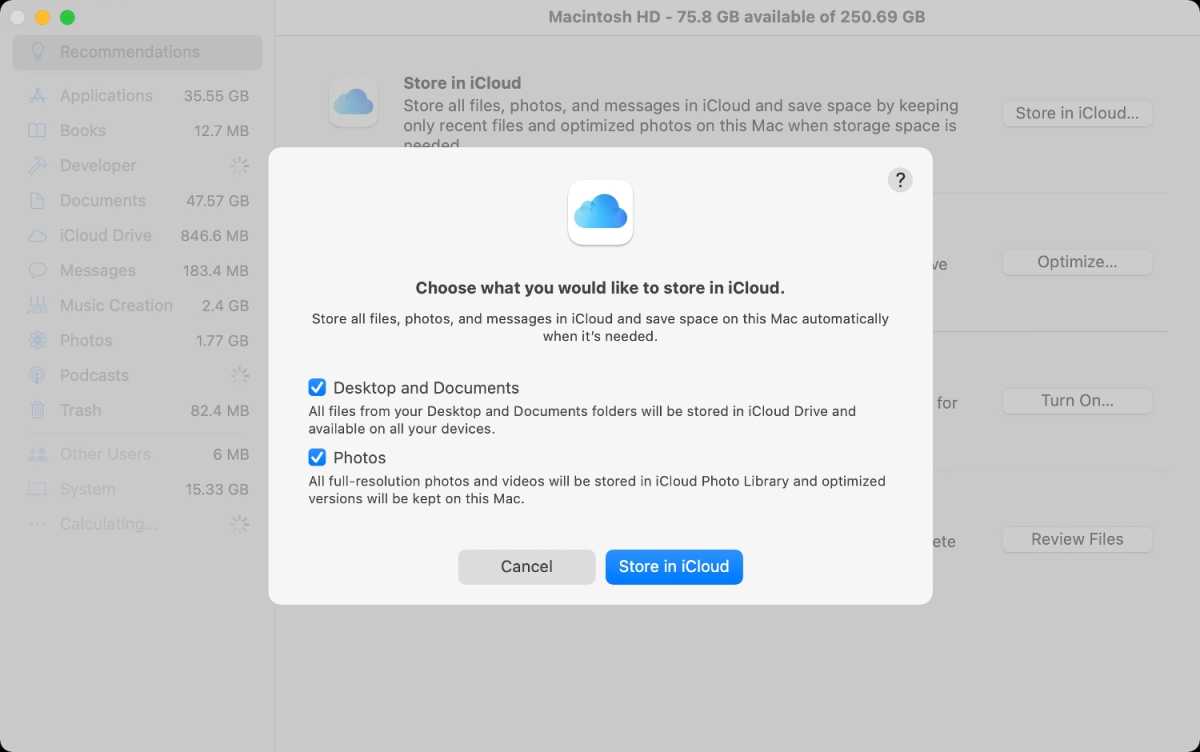
Fine-tuning the Store in iCloud option.
IDG
If you want to modify the Store in iCloud options after you have turned it on, you have to go to the iCloud system preferences for Desktop and Documents, and the Photos app preferences for iCloud Photo Library.
Option 2: Optimize Storage
Video files take up a lot of space. If you like to watch TV shows and movies from iTunes, you may not realize that the videos you have already watched are just sitting on your Mac. Optimized Storage automatically removes these files for you. You can download them from iTunes again whenever you want.
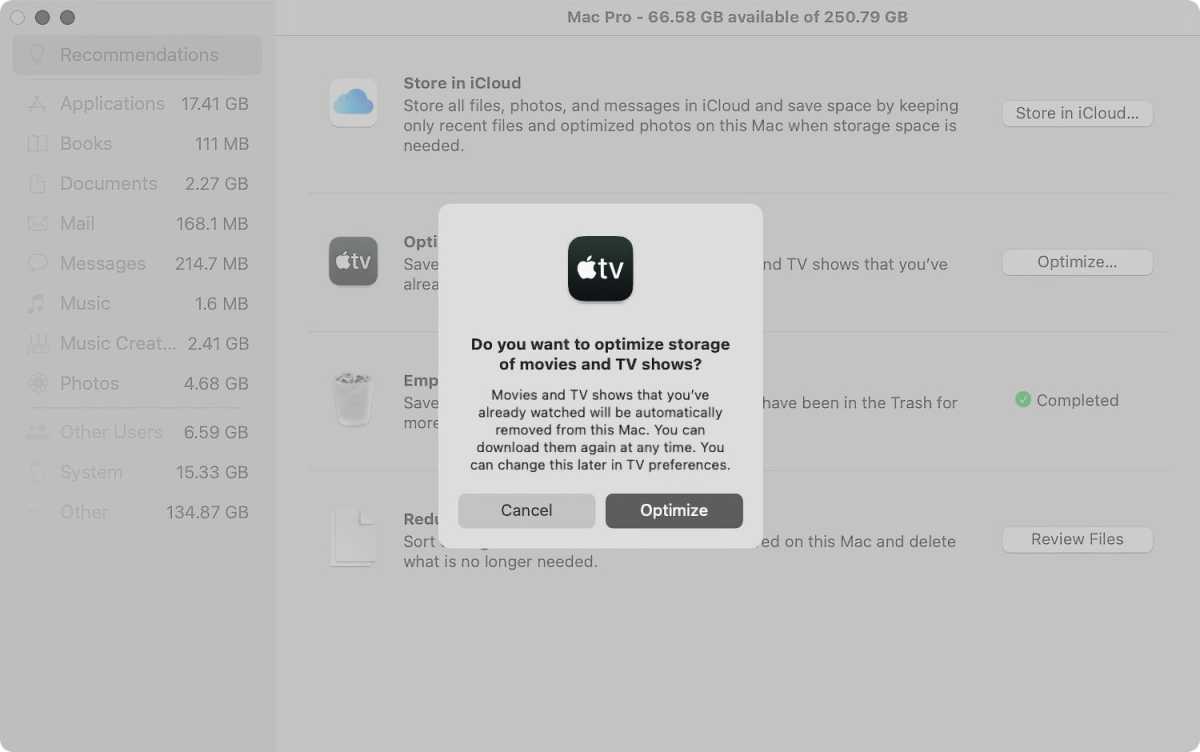
Automatically removes Apple TV shows and movies you’ve already watched.
IDG
If you turned this on and decide later that you want to turn it off, you do so in the TV app (TV > Preferences > Files).
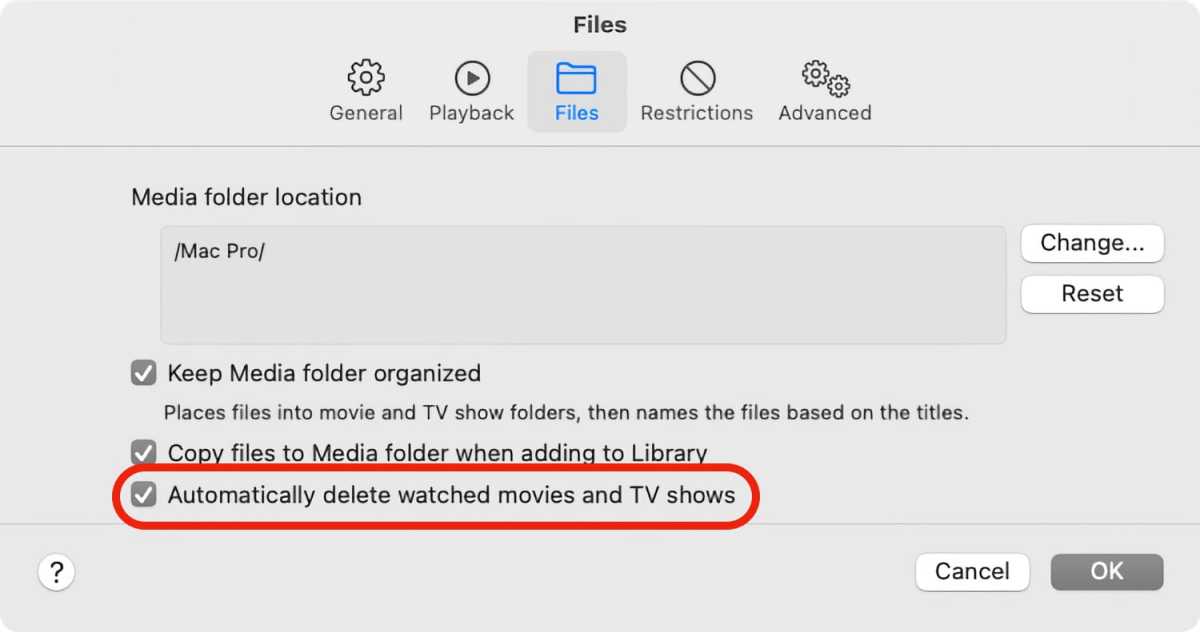
Modify the Optimize Storage settings in the TV app’ preferences.
IDG
Option 3: Empty Trash Automatically
What’s cool about this option is that it’s basically like the Recently Deleted folder of iOS’s Photos app. Items stay in the Trash for 30 days; once the 30 days are up, the item is deleted.
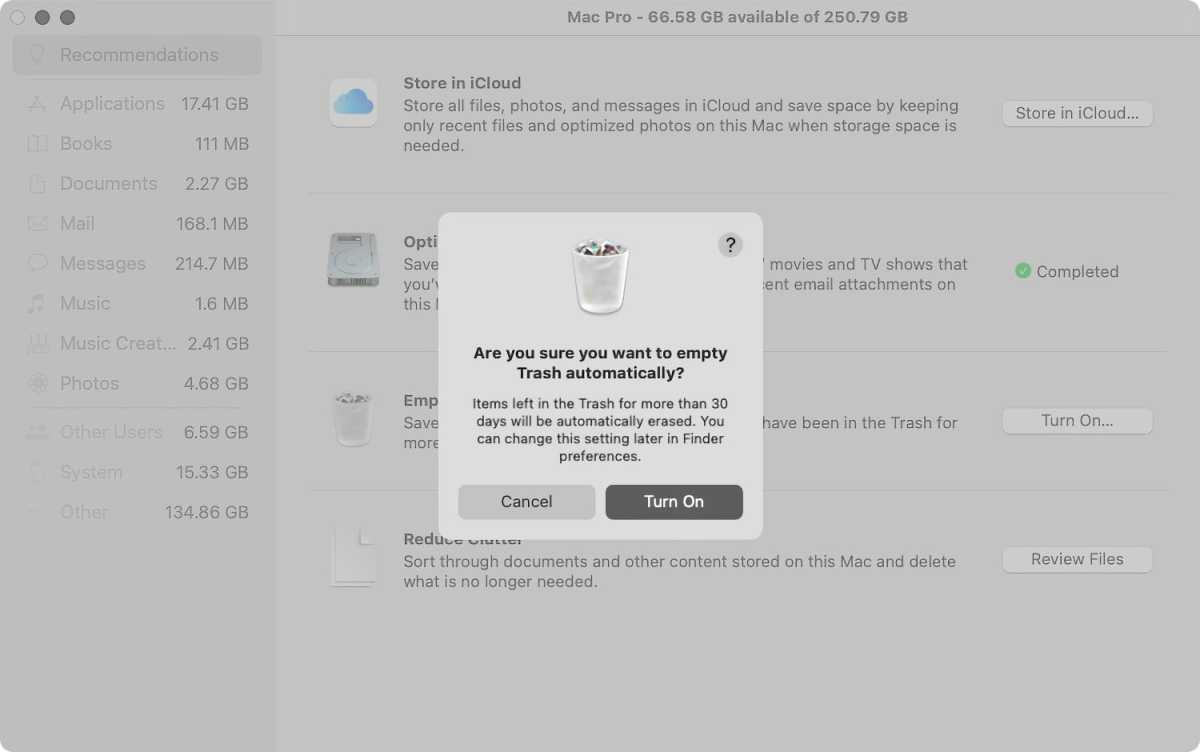
Erase Trash Automatically deletes files that have been in your Trash for 30 days.
IDG
If you decide to turn this feature off, you will notice that there’s no way to do so in this interface. You do it in the Finder preferences; in the Finder, select Finder > Preferences, then click Advanced. Uncheck the box for “Remove items from the Trash after 30 days.”
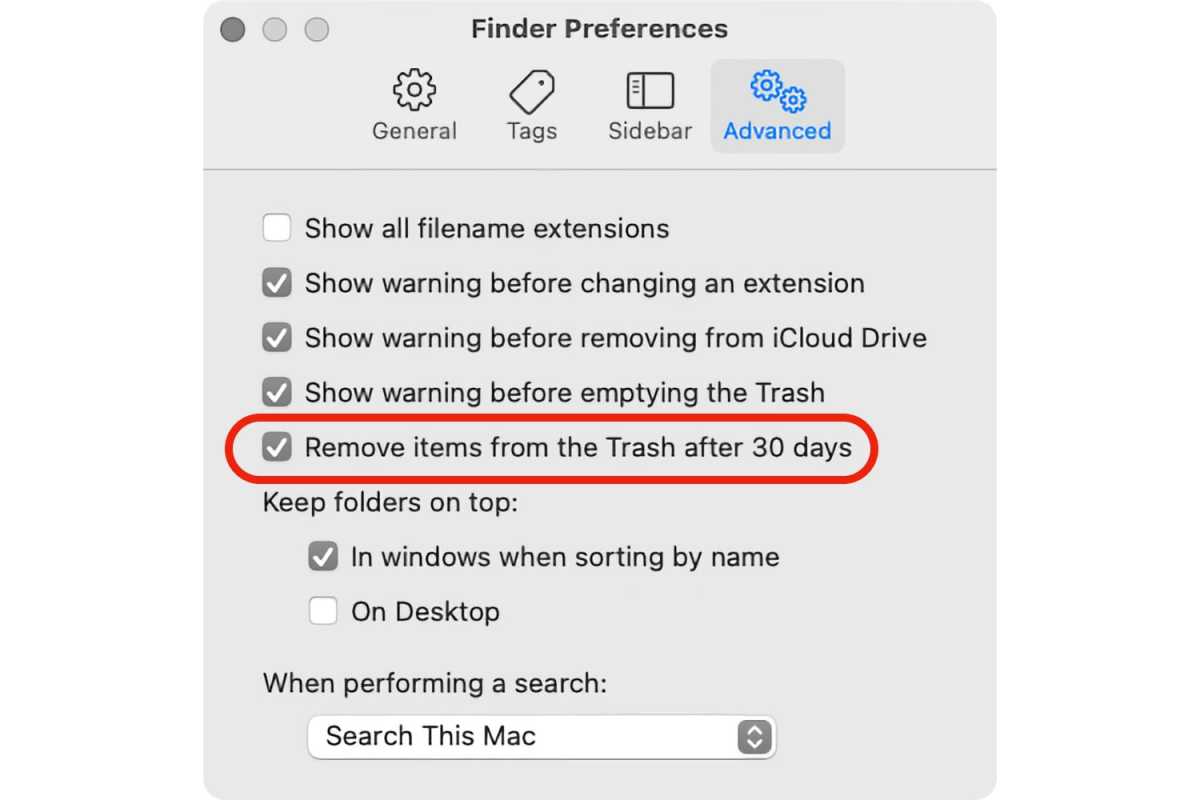
If you decide you want to turn off Empty Trash Automatically, you can do so in the Finder preferences.
IDG
Option 4: Reduce Clutter
This is an interface you can use to sift through your files and figure out which ones to delete or move to another storage medium. It’s more efficient than opening a bunch of Finder windows and looking at the files that way. Also notice that when you click on the Review Files button, it’s the same as selecting Documents in the left column.
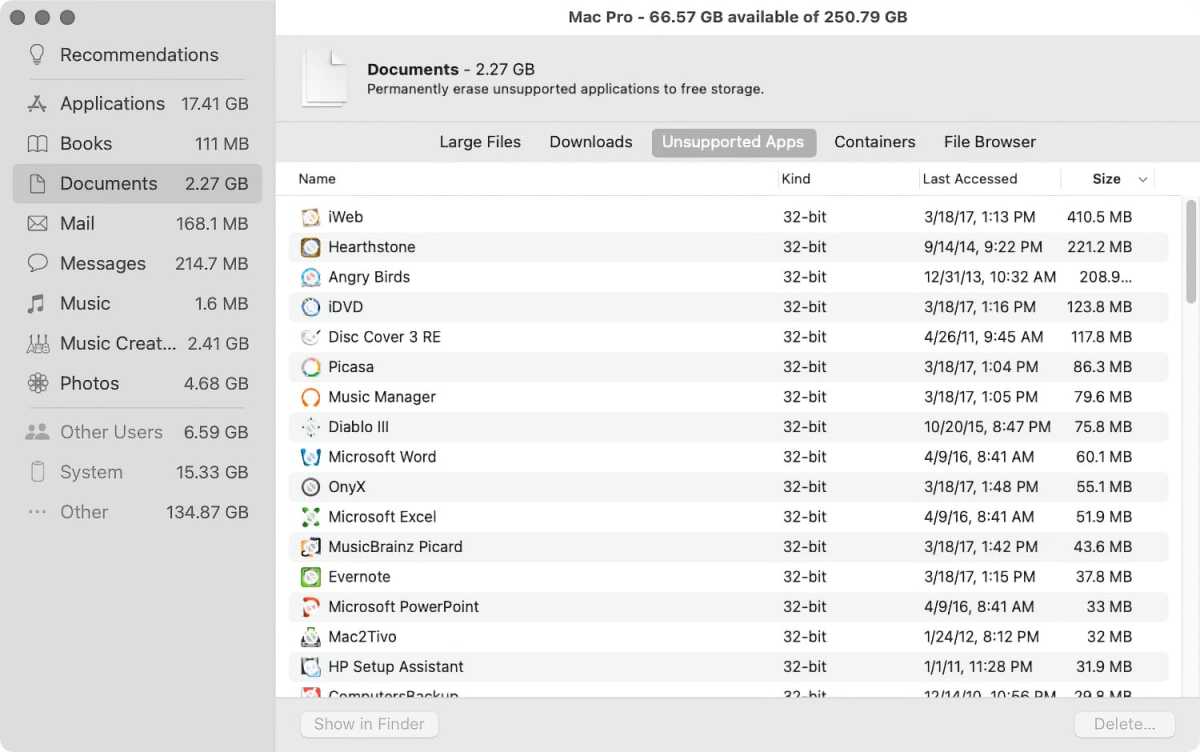
Reduce Clutter is the same as selecting Documents in the left column.
IDG
There are different ways to view the files on your Mac.
- Large Files lists the files on your Mac from the largest to the smallest.
- Downloads shows what’s in your Downloads folder.
- Unsupported Apps lists software that may not work on your Mac
- Containers are used by some applications in order to exchange data. They are often cleared automatically, but you can use this to clean a container yourself.
- File Browser lets you navigate your storage device. It’s like viewing a Finder window in List view.
To delete a file in any of these views, select the file, then click the Delete or Move to Trash button.
What’s in the left column of the window
The items that appear in the left column vary. What appears depends on how you use your Mac. For example, if you use Mail, then you’ll see an entry for Mail. If you use GarageBand, there will be an entry for GarageBand.
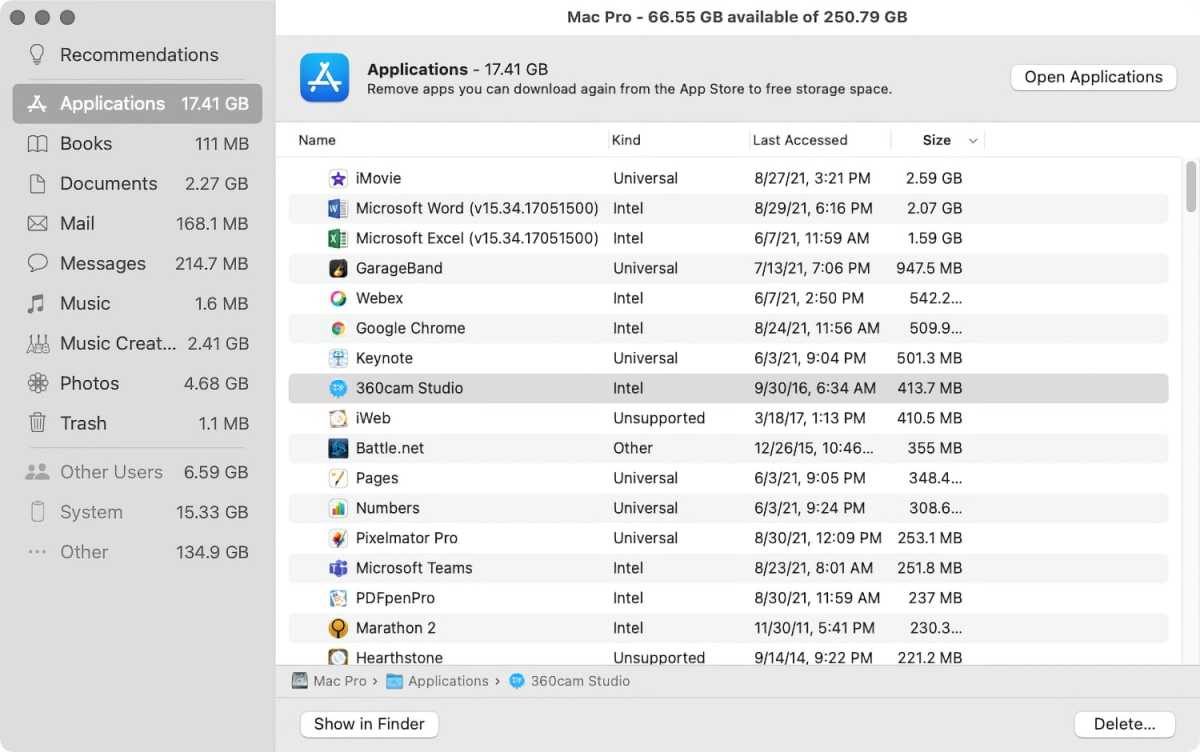
Applications can be deleted through Optimized Storage.
IDG
There is an Applications option in the left column that provides a view of some of the applications on your computer and lists them by size. When you select an app, you get the Delete and Show in Finder icons. Apple told me that it has been making an effort to encourage developers to follow its standard procedures for proper app installation, so if a developer has done this, you should be able to uninstall any app bought outside of the App Store along with all of its components through this interface.
This view doesn’t show every application on your Mac. None of the Apple apps are shown here, though App Store apps do appear. Mostly, this view is for apps you’ve installed on your own from the internet or from external media.
Roman has covered technology since the early 1990s. His career started at MacUser, and he’s worked for MacAddict, Mac|Life, and TechTV.
[ad_2]
Source link


