How to move data from an old Mac to a new one
[ad_1]
When you buy a new iPhone, getting it all set up takes minutes. All you need to do is back up your old phone and sign in to your iCloud account on your new phone, and you can pick up right where you left off, home screen layout, open Safari tabs, and all.
It’s not quite as simple on the Mac. While Apple offers several ways to transfer files from one machine to another, none of it is as simple as iCloud backups on iOS. But if you know which toggles to flip, apps to sync, and folders to share, it doesn’t have to be so hard. Just follow our guide to getting everything set up on your new Mac.
Apple services, passwords, and apps
First the easy stuff. If you subscribe to any Apple services, you only need to log into your iCloud account for the appropriate service—Music, TV, Arcade, News, etc.—to get back in sync. Your music and movie library, favorite shows, games, channels, and magazines will all sync and be ready to go.
The same goes for the other Apple apps you use: Mail, Contacts, Calendar, Safari, Photos, and Notes, as well as any stored passwords in your keychain. And since Safari is essentially a password manager now, you’ll be able to see all of your saved passwords from your old machine no matter how many years it’s been since you last logged in. Just head over to the Apple Account tab in System Preferences (or iCloud in pre-Catalina macOS) and make sure everything you want to sync is checked off.
iCloud Drive
There might not be an official way to back up everything to Apple’s online locker, but you can still use your iCloud account to transfer important files between machines. Inside the same Apple Account/iCloud preferences above, you’ll see a Desktop and Documents Folders checkbox, which will sync your file across all of your devices.
You’ll need some space, though. Apple only gives you 5GB of free space per account, so you’ll likely need more if you want to store a bunch of files. Apple offers monthly storage plans of 50GB for a buck, 200GB for $3, and 2TB for $10.
When you log into your new Mac, you should see an iCloud tab in the sidebar of your Finder window, but if it’s not there, you can add it in the Finder Preferences. Once they appear, you merely need to drag out the relevant files to your desktop and download any documents you want to store locally by clicking on the cloud icon.
You can also use your iCloud Drive to transfer files that aren’t in your Documents folder just by dragging them in. For example, if you want to save all of your downloads, simply drag the folder from your old Mac into your iCloud Drive and drag it out again on your new Mac.
Migration Assistant
For the rest of your data—apps, media, projects, downloads, etc.—you can use Apple’s built-in Migration Assistant. During setup on your M1 MacBook, you’ll be presented with an option for transferring your data from a Mac.
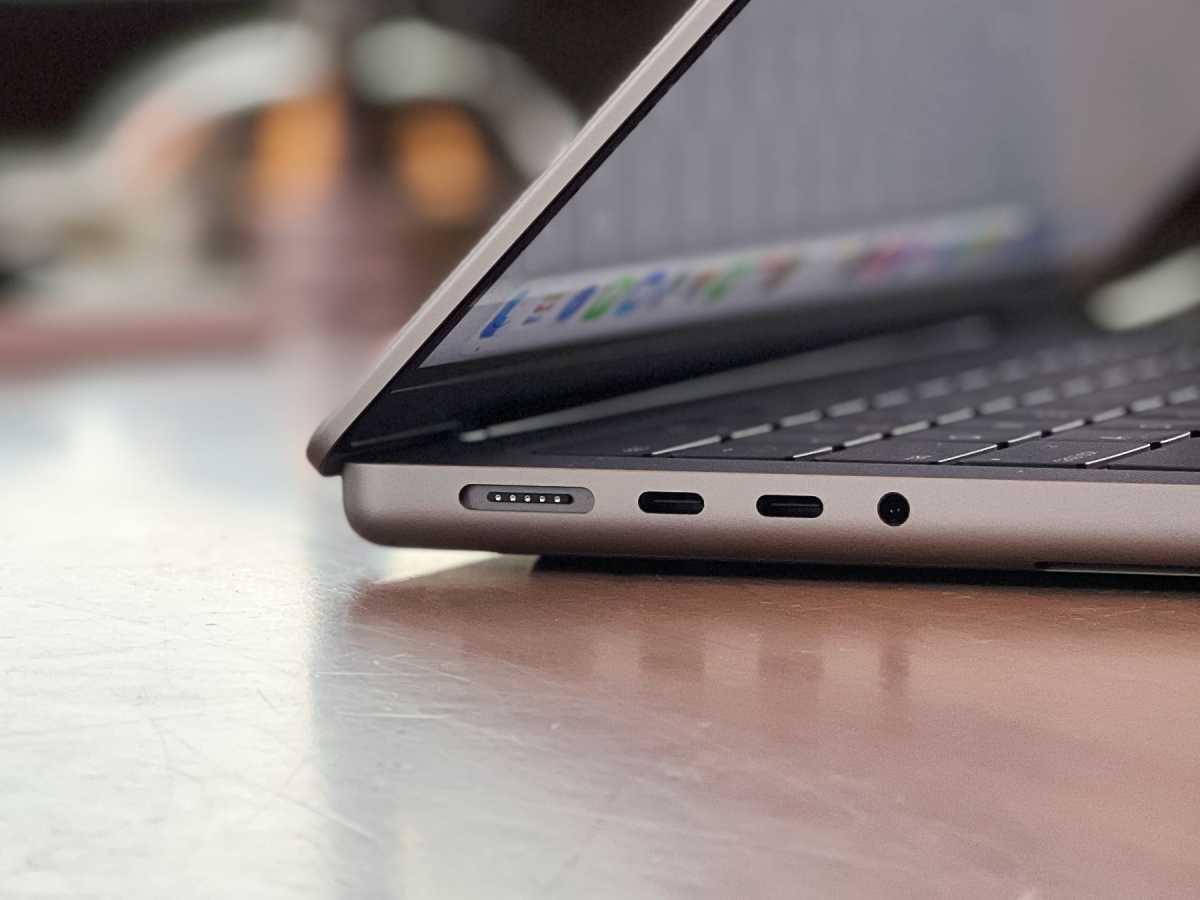
To start the process, you’ll need to open Migration Assistant on your old Mac, which can be found inside the Utilities folder in Applications, and connect the two machines using Wi-Fi or using a USB-C cable (which will be much faster). Then, simply select what you want to transfer to your new Mac (Applications, Users, Other Files, and System/Network Preferences), and click continue. You’ll probably need to let it run for a while, especially if you’re transferring over Wi-Fi, but once it’s done, all of your files will be on both machines.

You can use the Thunderbolt 4/USB-C ports on the MacBook Pro to transfer your data.
IDG
You can also choose to complete this process after you’ve gone through the initial Mac setup but launching Migration Assistant on both machines. That way you won’t have to wait a moment longer to start using your new Mac.
Time Machine
Finally, the absolute best way to get your new Mac looking like your old one is to restore from a Time Machine backup. You’ll need an external drive to get things going, but once you plug it in, you’ll be able to make a full-on clone of your old machine that will restore to your new one.
To get started, plug in your drive and head over to the Time Machine tab in System Preferences. Select your disk, pick any folders that you want to exclude from the backup, and start the process. Your first backup will likely take a couple of hours, but subsequent backups—which will be completed daily and stored monthly if you opt to back Up Automatically—will take mere minutes.
When you’re setting up your new machine, you’ll only need to select the latest Time Machine backup to restore everything on your old machine to your new one. It’ll be just as if you had been using the new M1 MacBook all along, with all of your apps and files where they belong.
Customization
No matter what method or methods you chose above, the only thing you’ll need to do is change your wallpaper, organize your Dock, and tweak any other appearance settings you’d like to customize. If you’ve turned on the System Preferences sync in the iCloud settings, some small settings will migrate over (like the position of the Dock, for instance), but the larger things will need to be re-adjusted. Just think of it as a chance to start fresh.
Since the new MacBook Pro has a notch, you might also want to consider a menu bar utility to keep things organized. We’re big fans of Bartender 4, which we gave 5 stars in our recent review. You might also want to pick a darker wallpaper that hides the dock.
Michael Simon has been covering Apple since the iPod was the iWalk. His obsession with technology goes back to his first PC—the IBM Thinkpad with the lift-up keyboard for swapping out the drive. He’s still waiting for that to come back in style tbh.
[ad_2]
Source link


