This M1 Mac display hack is a must for 1440p monitors
[ad_1]
On external monitors, 1440p resolution is supposed to represent the sweet spot, offering a sharper picture than HD without the high costs of 4K. Unfortunately, Apple doesn’t seem to agree.
On Macs with M1 processors, Apple reserves Retina or HiDPI display scaling options for monitors with at least 4K resolution. Unless you set the display to its native 1440p—which can look insufferably tiny on smaller external displays—text and icons come out blurry and fuzzy. Programs that used to fix the problem on Intel-based Macs no longer work on M1 machines, and users have been complaining about it for months to no avail.
Now, a third-party developer has come up with a workaround. It’s called BetterDummy, and it essentially tricks macOS into thinking you’ve plugged in a 5K monitor. Using Apple’s display mirroring features, you can then reflect the fake monitor’s contents onto your real 1440p panel and enjoy all the advanced scaling options that Apple itself won’t provide. (The app is free with optional donations.)
I’ve tested BetterDummy myself on a pair of external 1440p monitors and can confirm it works as advertised, but the setup isn’t exactly intuitive. If you’re living with tiny text or similarly grainy text and hazy icons on an M1-powered Mac with a QHD monitor, here’s how to make everything look sharp again.
Fixing 1440p on M1 Macs with BetterDummy
Download the latest version of BetterDummy from Github, extract the .zip file, and drop the BetterDummy.app file into your Applications folder. When asked if you’re sure about opening it, select Open.
Click the newly-created BetterDummy icon on the Mac menu bar, select Create New Dummy, then select the aspect ratio of your monitor from the list. This creates a new, high-resolution virtual monitor alongside your actual one.
Jared Newman / IDG
If you have multiple monitors that need fixing, click Create New Dummy again for each additional monitor you have. Confirm that the number of monitors in bold under Manage Dummies matches the number of monitors in your setup. If you don’t do this now you will need to repeat the entire setup process later.
Now that you’ve created your dummy monitors, it’s time for the act of trickery. Head to System Preferences > Displays, then select Display Settings.
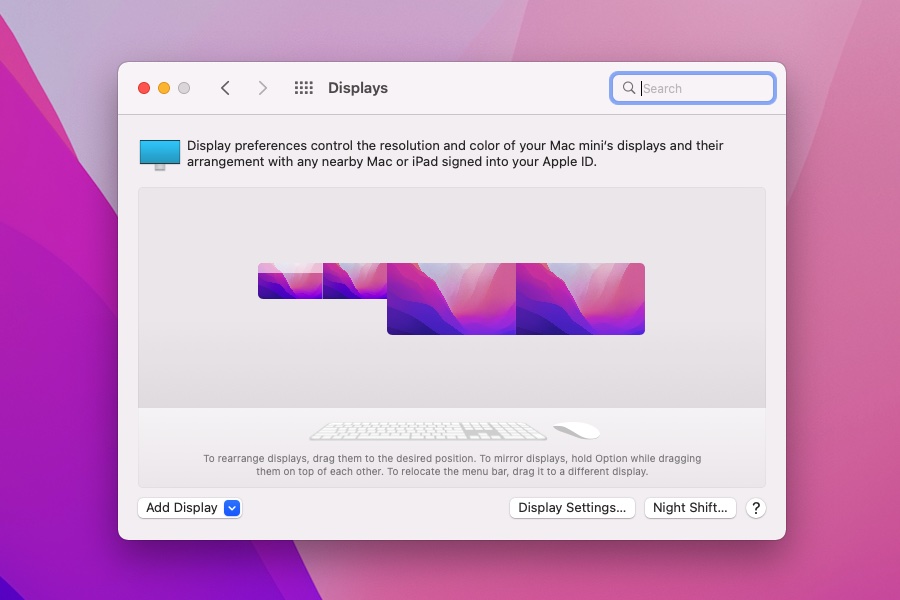
Jared Newman / IDG
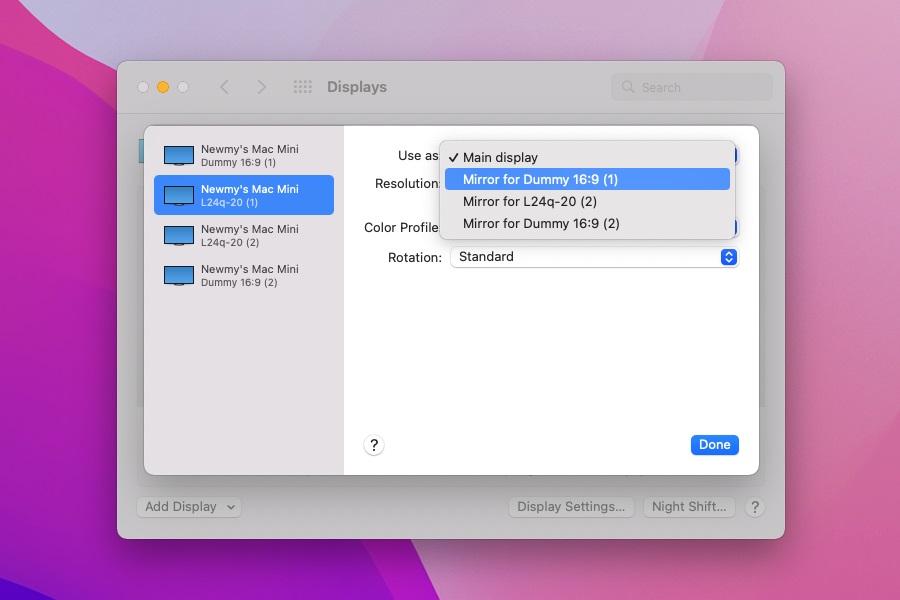
From here, select your actual display, meaning the one that does not say “Dummy” underneath. Under the Use as dropdown, select Mirror for Dummy.
Jared Newman / IDG
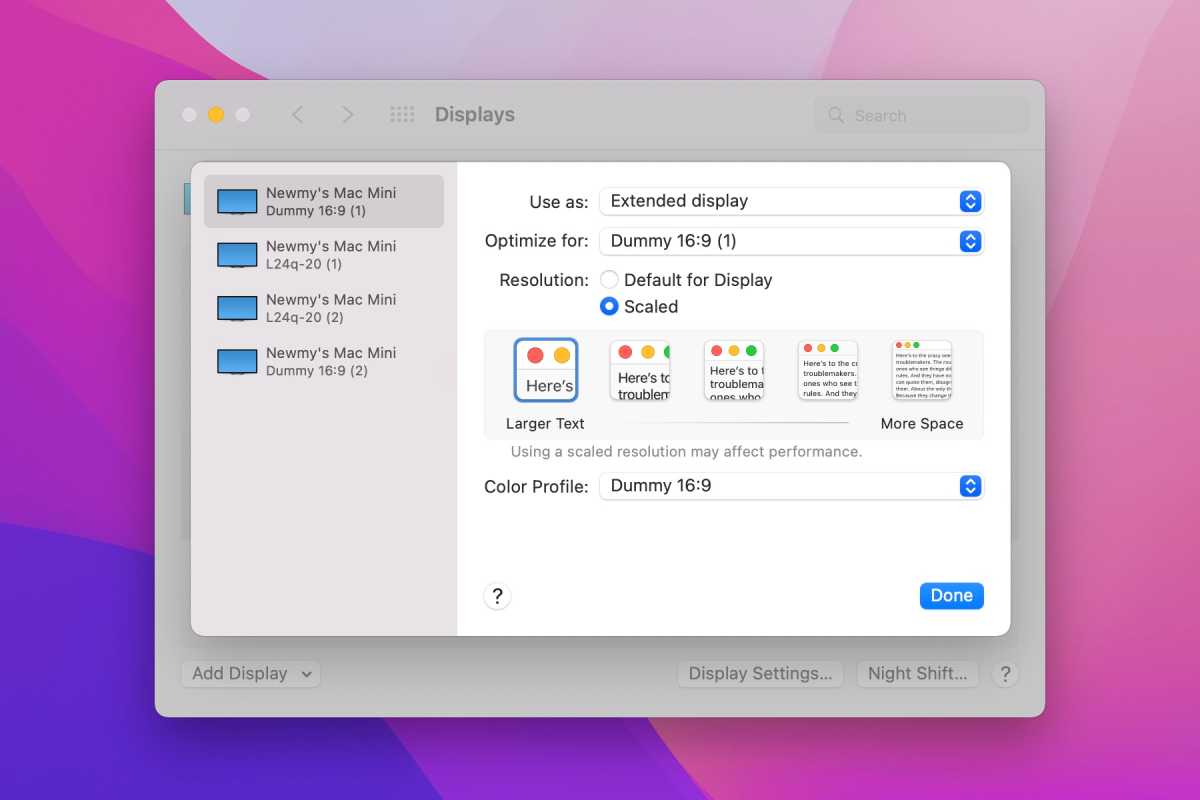
Be warned that this step may make everything look tiny on your monitor. Find the Scaled option in the Resolution list, then select the Larger Text icon at the far left side of the menu.
Jared Newman / IDG
At this point, text and images should be scaled up to a much larger size, while still preserving sharp text and crisp images. The last step is to fine-tune the scaling options so that everything looks just right.
Again, make sure you’ve selected your actual monitor from the Display Settings menu, then hold the Option key again and click Scaled.
You’ll now see a long list of resolutions to choose from. As a baseline, I suggest trying 1920 x 1080. If text and icons look too large at that setting, try 2048 x 1152 instead. If they look too small, consider 1760 x 990.
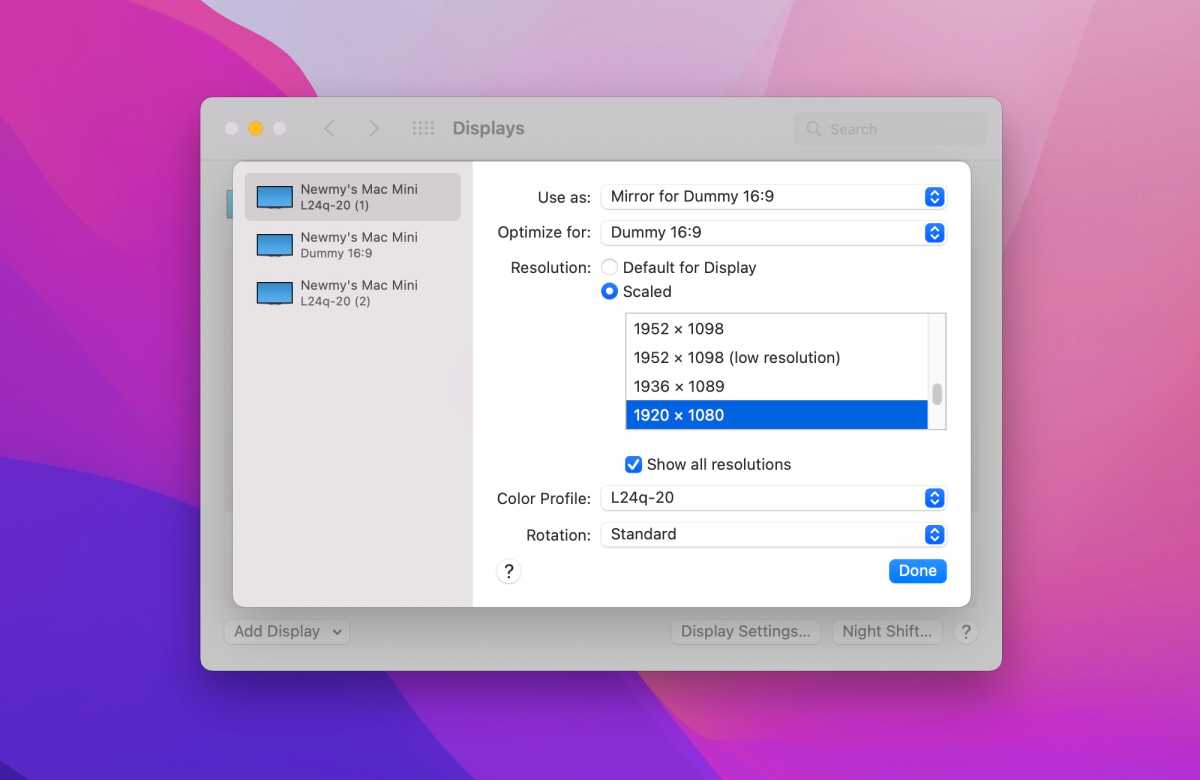
Jared Newman / IDG
To fix the resolution on additional monitors, repeat the Display Settings steps above for each screen, making sure to assign a separate Dummy monitor to each of your displays.
Additional options and caveats
While BetterDummy should come as a welcome relief for 1440p monitors, it’s still a work in progress and has some issues to be aware of.
Some users, for instance, have reported problems with putting their MacBooks to sleep via a hot corner or by hitting Shift-Control-Esc, as the virtual screens will simply freeze in place instead of turning off. If this happens, head to the BetterDummy menu bar icon and select Settings > Disconnect and Reconnect on Sleep, but be warned that you may still run into sleep issues on rare occasions.
BetterDummy can also stop working when you unplug a monitor, plug in a new one, or connect an iPad to use with Sidecar. If this happens, click the BetterDummy menu bar icon, then disconnect and reconnect your Dummies under the Manage Dummies menu.
Finally, keep in mind that the option to automatically run BetterDummy at startup is off default. You can change this via the menu bar under Settings > Start at Login, but you’ll still have to enter your device password and wait a few moments before BetterDummy’s mirroring trickery kicks in.
Jared Newman covers personal technology from his remote Cincinnati outpost. He also publishes two newsletters, Advisorator for tech advice and Cord Cutter Weekly for help with ditching cable or satellite TV.
[ad_2]
Source link


