How to take screenshots and record video on your Mac
[ad_1]
One of the best features of macOS over the years has been its built-in screen capturing utility. Working on a computer often means taking screenshots, whether it’s to show a colleague what you see, file a ticket for support, or grab images from the web or apps for creative use. Most modern computers have some way to take screenshots, but they’re often either too bare-bones or too complicated. Apple’s screen capturing features are right in the goldilocks zone–simple enough to be fast, but powerful enough to be useful.
There are three keyboard shortcut to know about when capturing your screen in macOS. One just instantly captures the whole screen, another captures just one region of the screen (you can drag out a rectangle or capture one window), and a third brings up a flexible toolbar that includes multiple options including video recording.
Here’s how screen capturing works on macOS.
Shift-⌘-3 for a quick screenshot
Tap Shift, Command (⌘), and 3 at the same time and your Mac will instantly capture everything on the entire display.
A small thumbnail will appear briefly in the lower right corner. You can click on that to open a quick editing tool that lets you crop, mark up, overlay text, and more before saving it to the default screenshot location (the desktop, unless you change that–see the section below). You can also click the thumbnail before it disappears and drag it to a folder or document, or swipe it to the right to make it save and disappear immediately.
It will be saved as a .png image file with the name “Screen Shot [date] [time].png”
IDG
Shift-⌘-4 to capture only part of the screen
Tap Shift, Command (⌘), and 4 at the same time and your mouse cursor will change to a crosshairs selector. Click and drag the crosshair to select the area of the screen you want to capture, and when you release the mouse/trackpad button you’ll get a screenshot of only the selected region. As with the Shift-⌘-3 shortcut, you’ll get a brief thumbnail popup first.
If you press and hold the Space Bar while dragging out your capture region, you can move the region around.
If you want to cancel capturing the screenshot, press Esc.
You can also capture the contents of a single window (even if it is partially hidden by other windows). After pressing Shift-⌘-4, tap the Space Bar to toggle between the crosshairs selector and a window selector, represented by a camera icon. There is no need to hold Space Bar down, just tap it once (repeated taps just switches back and forth between the window selector and region selector). Position the camera icon in the window or menu you wish to capture (it will be highlighted), and click.
Shift-⌘-5 to capture video or access options
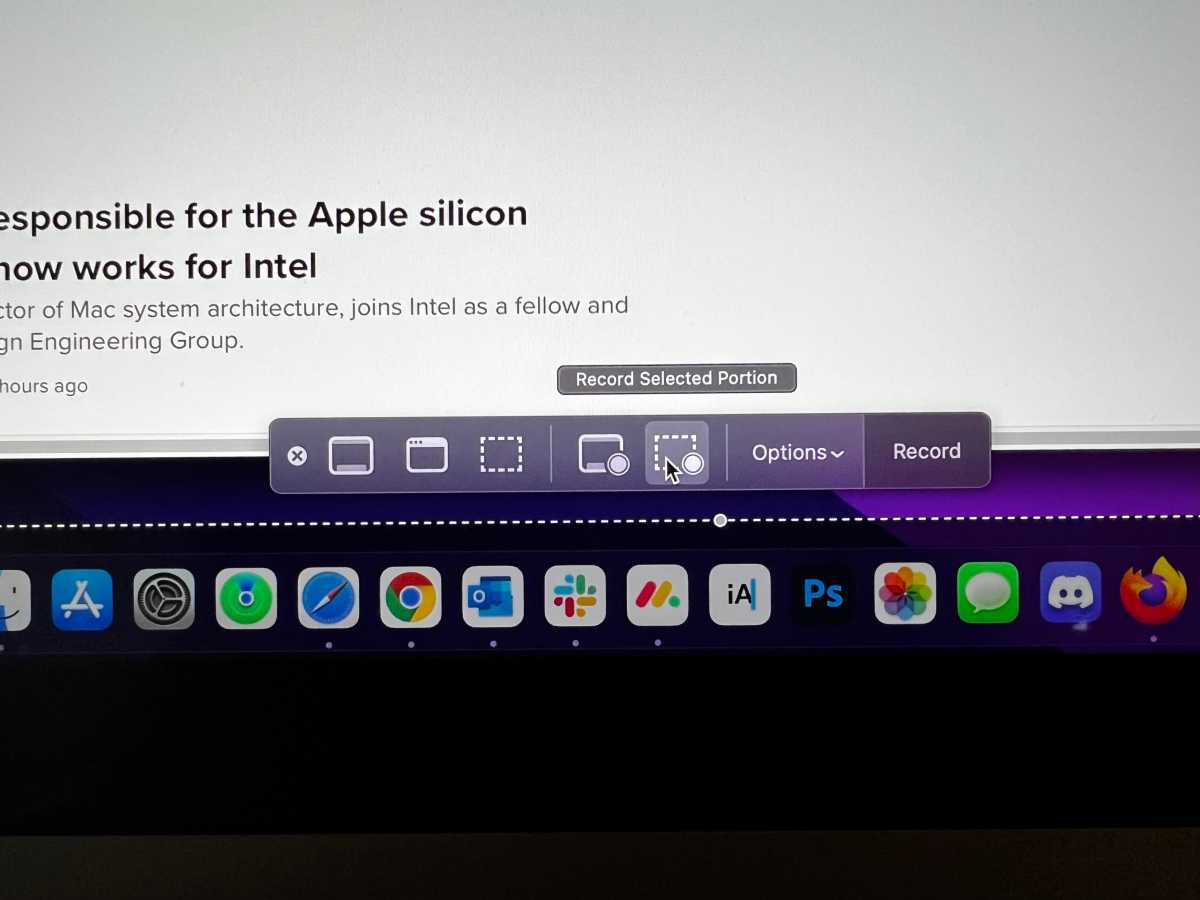
If you tap Shift, Command (⌘), and 5, you’ll see a little capture bar pop up at the bottom of your Mac display. The first three options mirror what you get when you press Shift-⌘-3 or 4: capturing the whole screen, a window, or a selection.

IDG
The next two options let you record video of your screen, either the entire screen or a selected portion (you’ll be able to resize and position the selection before you start recording). Click Record to start recording. You’ll see a small record button appear up in the menu bar at the top of your screen. Click that to stop recording.
Just as with screenshots, you’ll see a small thumbnail pop up in the lower right for a few seconds before the file is saved to your screen capture location. You can drag that thumbnail to a new location, or click on it to open a preview. There are buttons in the upper right of the preview to trim the ends of the video, delete it, or share it.

IDG
The file will be saved as an H.264 video with the .mov extension, and the file name “Screen recording [date] [time].mov”
Change screen capture location
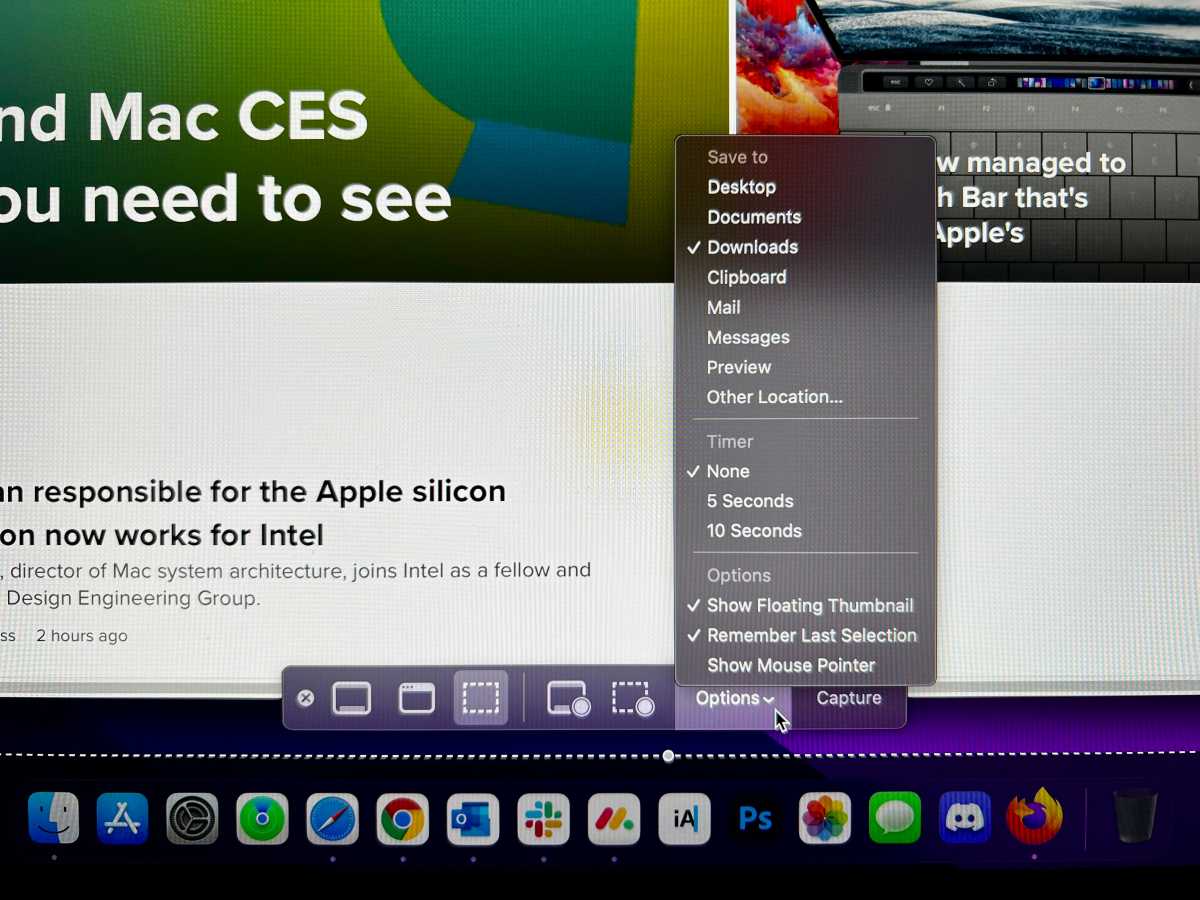
When you press Shift-⌘-5, you’ll see an Options button on the capture bar. This menu allows you to select where you’d like save your captures (images or video). Once you select a folder, all future captures will be saved there until you change it again.

IDG
Take a timed screenshot
Also in that options menu when you press Shift-⌘-5, you’ll see the ability to set a timer. The default value is None, but 5-second and 10-second options are also availble.
When you choose one of these, the screenshot will capture (or the video will start recording) five seconds after you click to capture. A little floating timer window shows you how much time you have left.
I have written professionally about technology for my entire adult professional life – over 20 years. I like to figure out how complicated technology works and explain it in a way anyone can understand.
[ad_2]
Source link


