How to clean install macOS on your Mac
In this article, we’re going to show you how to perform a clean install of macOS. There are a number of reasons why you might want to do a clean install:
You might want to reinstall the operating system in order to correct problems with your Mac – doing a clean install may be a good option if your Mac is running slow or otherwise misbehaving.
Doing a clean install allows you to clear away old files that you might have been accumulating for years before installing the operating system onto a freshly formatted disk.
A clean install is also something you should do before selling your Mac or passing it on. It allows you to remove all your data from your Mac and return it to factory settings for the next person.
A clean install is also something many computer users resort to when they are trying to get rid of a virus (although there is a lot of debate about whether there are viruses on the Mac).
Whatever your reason, a clean install of macOS might solve a lot of problems.
However, changes in recent years may mean that a clean install is not necessary, so we will start by explaining why you might not need to do a clean install on your Mac.
You should also keep in mind that there are multiple ways to do a clean installation of macOS. Traditionally, the way was to make a bootable copy of the macOS installer on a USB stick and then reformat your drive before installing the bootable copy onto your Mac. There is also an even simpler method that allows you to use macOS Recovery to reinstall the Mac operating system over the web (we have a separate tutorial about doing a clean install of macOS using Recovery).
Plus, if you are running macOS Monterey or later on a M-series Mac, or an Intel Mac with a T2 chip, then a setting in System Settings/System Preferences makes wiping your Mac easier than ever. We’ll run through all of these methods below.
Should I do a clean install on my Mac?
In the past, it was helpful to reinstall the system if you wanted to correct some Mac problems, but today this solution doesn’t make as much sense.
Since macOS Big Sur (introduced in 2020), macOS has its home on its own volume, which is both read-only and cryptographically signed and sealed (referred to as a Sealed System Volume). This seal is stored either in the T2 chip of the newer Intel Macs or in the Secure Enclave of the Apple M-series chip (aka Apple Silicon).
Each component of the system is signed in hierarchical order, and any change to a component would also invalidate the seal that represents the top level. For further security, these Macs also do not start directly from the system volume, but from a snapshot of the system–and snapshots cannot be changed, even by the system itself.
So macOS itself cannot be changed by any software that you install as a user. Should a problem occur with macOS during a restart, perhaps because a storage space on the SSD is defective and thus a system component is no longer intact, this will be recognized by the startup process since the seal will now be invalid. Should this happen you will have to reinstall the system.
However, if your Mac boots up without issue then it indicates that there are no problems with the system. As long as your Mac works (which can be determined on the basis of the seal), the Mac is considered to be in working order as it complies with Apple’s specifications.
For that reason, even if you do encounter problems on Macs with T2 chip or Apple Silicon while running macOS, it makes no sense to reinstall the system yourself.
For those who want to do a clean install so that no leftovers that belong to an old system are carried along, this no longer applies because none of this information is carried over. All components are checked after installation, then signed and finally the entire system is sealed again. Again, the seal guarantees that everything is fine and that nothing untoward has crept in.
However, there is one component of the system software that is not installed on the read-only system volume. All other user-installed programs reside on the volume with the user data, including Safari. This means Apple can offer a separate update for the browser and WebKit, so that you do not have to reinstall the whole system each time.
In the case of Safari and other apps there can be benefits in cleaning up your Library folder since it may still contain remnants of old applications you no longer use.
If you feel that you have a lot of this sort of crud on your Mac then wiping your drive could be useful, just be prepared that it can be a risky business and you may end up deleting something important. Beware that a clean install can cause more problems than it fixes.
You might prefer to use an application like CleanMyMac X from MacPaw ($39.95/£34.95 a year, free trial), or one of these alternatives: Best Mac Cleaner software.
If you are happy to take the risk and still want to wipe your Mac and reinstall macOS – which you should definitely do if you are selling or passing on your Mac – read on!
Three ways to clean install macOS
As we explained above, there is more than one way to wipe your Mac and reinstall macOS:
Make a copy of the macOS installer on a USB stick, reformat your drive and then install the macOS onto your Mac from the installer.
Use macOS Recovery to reinstall macOS via the web.
Use the Erase All Content and Settings option setting in System Preferences (available if you are running macOS Monterey and later on a M1 or later Mac, or an Intel Mac with a T2 chip).
Not only are there three different methods (which we’ll run through below) the methods depend on the version of macOS that you are running.
There is also the even trickier business of installing a clean copy of an older version of macOS on your Mac (e.g. Ventura, Monterey, Big Sur, Catalina, High Sierra, Sierra, El Capitan, Mojave, Yosemite or an even old version of OS X). Speaking of which, if an old version is what you’re looking for, it may be worth taking a look at another article where we focus on that entirely: How to download and install old versions of OS X on a Mac.
Before you begin: Back up your Mac
Before you begin we recommend that you make a backup, just in case something goes wrong. Full instructions here: How to back up a Mac. It’s entirely possible that there will be something on your Mac that you thought was in the cloud but was actually on your Mac (we speak from experience!)
Note that with regard to backups, you probably won’t want to recover a Time Machine backup if you don’t want to copy over all the settings and preferences associated with your old system. You could alternatively sync all your Documents and Desktop with iCloud rather than run a full backup, but make sure that everything you need is in the cloud and be aware that you may lose your settings and applications. We have some alternative Mac Backup solutions here.
Option 1: Erase All Content and Settings (macOS Monterey and later)
Before the arrival of Monterey, it was necessary to create a bootable USB drive or use Recovery Mode to wipe your disk. However, since macOS Monterey Apple has made it easy to get a factory-fresh installation.
An Erase All Content and Settings option arrived with macOS Monterey (in 2021) that allows you to reset your Mac to factory settings without having to work through the many steps to wipe and format your drives.
The new option wasn’t available on every Mac running Monterey though. An M1 or later Mac, or an Intel Mac with a T2 chip inside was required to use the Erase All Content and Settings option.
These Intel Macs have the T2 security chip:
MacBook Air from 2018
MacBook Pro from 2018
Mac mini from 2018
iMac 27-inch from 2020
iMac Pro
Mac Pro from 2019
In macOS Ventura and later
Foundry
In Ventura System Preferences became System Settings, so the method slightly changed and things look completely different, so we will run through both methods.
Here’s how to find Erase all Content and Settings in macOS Ventura or later.
Open System Settings.
Click on General.
Click on Transfer or Reset.
Choose Erase all Content and Settings.
In macOS Monterey
Foundry
If you are running macOS Monterey the Erase All Content and Settings option is much easier to find.
Open System Preferences.
Click on System Preferences in the menu bar at the top of your screen.
Click on Erase All Content and Settings.
Now that you have located the Erase All Content and Settings option, follow the steps below to wipe your Mac.
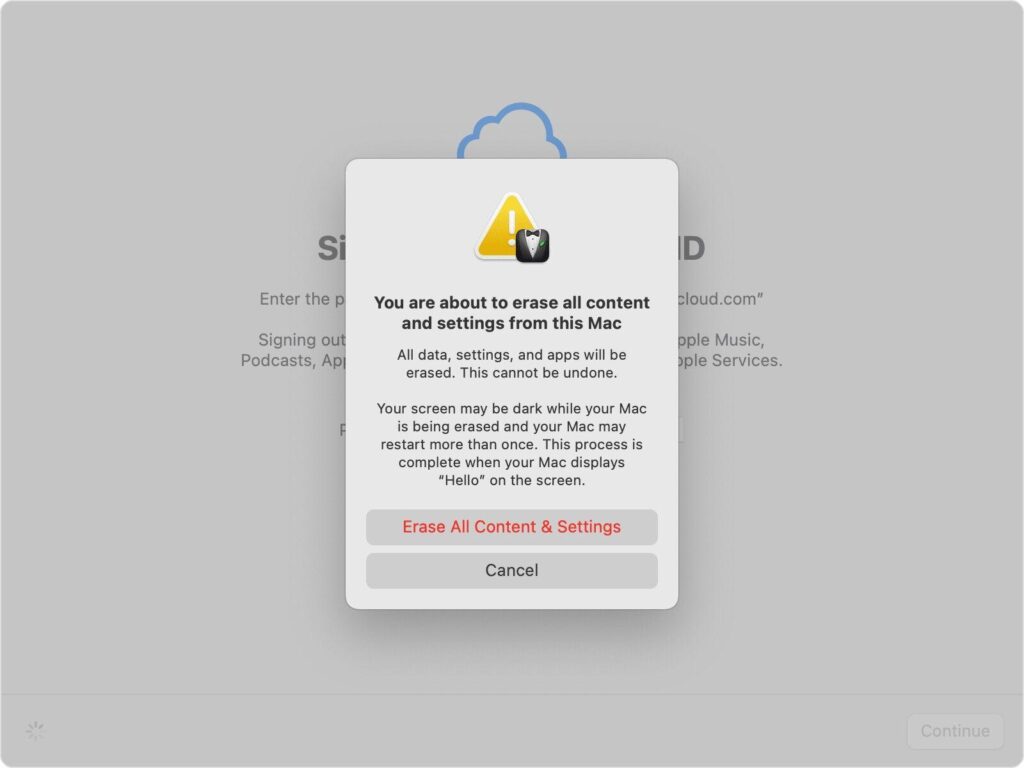
Select Erase All Content and Settings
Enter your password.
You’ll be reminded to do a backup with Time Machine before you begin deletion, but you can skip that step.
A window will show you what will be deleted, including Apple ID, Touch ID, accessories, and Find My settings.
Finally, you will need to log out of your Mac and all related services using your Apple ID.
Before your Mac is erased you receive a final warning, so if you have second thoughts at least you can stop at this point!
Having clicked the second Erase All Content & Settings your Mac will restart. Eventually, you will see a black screen while it restarts.
Once your Mac restarts you can go through the steps to set it up as new, or you can leave it at this stage for the next owner to set up. Just turn the Mac off first.
Option 2: Do a clean install via Recovery
Foundry
We explain how to reinstall macOS via Recovery here: How to reinstall macOS, but we will summarise the steps here.
How you enter recovery mode depends on the Mac you own.
If you want to enter recovery mode on an M1 or later Mac follow these steps:
Press and hold the power button when you start up your Mac.
Continue to press and hold the button until you see a startup options window appear with an Options icon.
Select Options.
Click Continue.
To enter Recovery on an Intel Mac press Command+R.
Once Recovery starts up you’ll see a macOS Utilities window with options to Restore From Time Machine Backup, Reinstall macOS [version], Safari (or Get Help Online in older versions) and Disk Utility. If you want to wipe the Mac before reinstalling choose Disk Utility.
Using Disk Utility run through the steps to erase your Mac as detailed in our How to reinstall macOS guide.
After you have erased your drive click on Disk Utility > Quit Disk Utility. Or just Command + Q.
Now choose Reinstall macOS from the options.
Wait while macOS is reinstalled. Expect this to take a while.
Option 3: Do a clean install macOS using a bootable USB
Now for the method that involves using a bootable USB with the macOS installation on it. This might be the best method if you already have the installation files downloaded and don’t want to wait for hours for Recovery to download the files.
Tools required: A 15GB or larger removable USB flash drive to hold the installer file for our chosen version of macOS. (We’re going to erase it, so make sure it doesn’t contain any valuable data.) Admin privileges for the Mac. A back up, just in case something goes wrong.
Format the external drive
Foundry
We’re going to re-download the installer file for our chosen version of macOS and store it on a USB stick or external drive. But before you do that you can prepare the USB drive by reformatting it.
Here’s how to format your USB drive correctly:
Plug in the USB drive.
Go to Applications > Utilities.
Open Disk Utility.
Select the drive and click Erase. (The name of the disk needs to be “Untitled”, if the Terminal commands below are to work, so rename it if necessary.)
Select Mac OS Extended (Journaled) as the format type.
Choose GUID Partition Map from the Scheme options (if you don’t see this you are in the wrong view – you need to select the external drive, not the container below it).
Click Erase.
Disk Utility will create the partition and set up the drive (it can take a while).
Click Done.
Get the macOS install file
Foundry
If you’re reinstalling the latest version of macOS, or installing a new version of macOS, the next step is relatively easy although the process for obtaining the installer will be different.
How to download the installer via Software Update
If you are currently running Ventura and want to do a clean install of macOS Sonoma, for example, then you can download the installation package via System Settings.
Open System Settings.
Choose General.
Choose Software Update.
Download the macOS Sonoma install files (don’t install it!)
How to download the installer from the Mac App Store
Alternatively, find Sonoma on the Mac App Store and click on Get to download it from there (don’t install it).
If, on the other hand, if you are running Ventura and you want to reinstall Ventura grab the Ventura installer from the Mac App Store here. If it’s an older version of macOS you are after, you can also find links to those below. Also read: How to install older versions of macOS or OS X, but note that you will need to confirm that you Mac can run that version of macOS. See: What version of macOS can my Mac run.
Monterey is on the Mac App Store here.
Big Sur is on the Mac App Store here.
Catalina is on the Mac App Store here.
You can get macOS Mojave via this link.
Download High Sierra here.
Sierra is here as a direct download.
El Capitan can be downloaded from this link.
Yosemite is available here.
(If those links don’t work close the Mac App Store and cut and paste the links into Safari. For more advice on getting hold of even older editions of Mac OS, see How to get old versions of OS X.)
Once you have located the version of macOS you want on the Mac App Store follow these instructions:
Hit Download or Get (depending on the version of the Mac App Store you are using).
You may get a warning message at this point, telling you that this version of macOS ‘is already installed on this computer. Would you like to continue?’ Click Continue.
Enter your Apple ID and password.
The install files will start to download.
The installer file will be multiple gigabytes. macOS Big Sur was 12.6GB, for example, so expect downloading to take a while.
Don’t install yet!
Whichever way you get the install file the next step is worth highlighting for what you shouldn’t do, rather than what you should do:
When the macOS installer has finished downloading the installer will launch automatically, but we don’t want to use it yet so don’t click to start the installation!
Press Command + Q to quit out of the installer.
Find the installer file (it will be located in your Applications folder, or you could search for it using Spotlight (command + Space and start typing Sonoma, Ventura, Monterey, Catalina or Big Sur).
Create a bootable USB disk
Foundry
Next we need to turn the USB drive into a bootable USB disk so that we can use it to install a new copy of macOS on our Mac after we have reformatted it (that step will come later in this tutorial).
We’ve got full instructions on How to make a bootable macOS install drive in a different article, but we’ll run through the basics here.
We’re going to create the bootable drive using Terminal, which you can open on your Mac by pressing Command + Space bar and typing Terminal.
Connect the USB drive that you formatted earlier to your Mac. Make sure it’s called Untitled – rename it if necessary (this will help you enter the correct text in Terminal in the next steps).
Creating a bootable installer has been pretty easy since the arrival of Mavericks in 2013 thanks to the Terminal command createinstallmedia that arrived in that version. Here’s how to use it (note that the name of the version of macOS will depend on which version you are installing):
Open the Terminal application on your Mac (find it by searching using Command + Space and typing Terminal)
Now copy and paste the following text into Terminal (This text is for Ventura – we include the text needed for the other versions of macOS in this article). When you cut and paste the following text into Terminal do check that it maintains the — as we have heard of people pasting in the — and it converting to –)
sudo /Applications/Install macOS Ventura.app/Contents/Resources/createinstallmedia –volume /Volumes/MyVolume (where MyVolume is the name of the external drive you are using – it could be Untitled).
Press Return.
Enter your password (you won’t see the password appear).
Press Return again.
Terminal will warn that it is about to erase the drive. If you want to continue press Y and then Return. The process can take a while, you’ll see “Erasing Disk: 0%… 10%… 20%… 30%…100%…
Next Terminal will spend a few minutes copying the installer file to your drive. “Copying installer files to disk… Copy complete” and so on will appear in the Terminal window. Again, this can take a while – it took our Mac ages to go from 0% to 10%…
When the bootable drive is prepared you will see the word Done. It can take a while.
Now you have the installer on the external drive you can use that to install copies of macOS on multiple Macs – which could be helpful if you are admin for a lot of systems.
However, if you are reading this because you want to do wipe your Mac and do a clean install, read on…
Wipe your Mac
Foundry
Now we are ready to install the copy of macOS from the installer drive on our Mac. If you want to do a fresh installation (and completely wipe your Mac) it’s time to reformat your Mac’s start-up drive.
If you have a recently modern Mac with Monterey installed, you would be best off wiping your Mac using the Erase all Contents and Settings option. But for those running older Macs with older versions of macOS will need to use Disk Utility to delete their data.
If you are running macOS Catalina or Big Sur you will have two volumes: Macintosh HD and Macintosh HD – Data. If you want to do a clean install of macOS over an existing installation you will need to delete the Macintosh HD – Data volume. We cover how to do this in more detail here: How to reset and wipe a Mac.
Macintosh HD – Data is where your data is stored separately to the macOS installation.
Either click on the – button or go to the menu and choose Edit > Delete APFS volume.
You will see a message warning you that this will permanently erase your data. Click on Delete. Do not choose Delete Volume Group.
Wait while the volume is deleted.
Then you can move on to deleting your Macintosh HD volume as above.
Here’s how to do a fresh installation of macOS if you aren’t already running Catalina, Big Sur or later.
Connect your boot drive.
Start – or restart – your Mac while holding down the Option key (also known as Alt). This will take you to Startup Manager.
Choose to install your chosen version of macOS from the external drive.
Select Disk Utility.
Select your Mac’s start-up disc, probably called Macintosh HD or Home.
Click on Erase.
Wait for your startup disk to be formatted.
Go back to the main Utilities menu and choose Install macOS.
Choose your startup drive as the location to install macOS.
Once installation is complete, you can restore apps and settings from your backup, or download them again manually.
Install macOS
IDG
Now you can use your bootable installer to do a clean install of macOS on your wiped Mac.
The process for installing the OS from the bootable installer is slightly different if you have an M1 or M2-series Mac (also known as Apple Silicon) or an Intel processor inside your Mac. We’ll run through both methods.
In both cases, you will need to have your Mac connected to the Internet. It also needs to be compatible with the version of macOS you are trying to install (you can’t install a macOS older than Big Sur on a M-series Mac).
How to install macOS from a bootable installer
If you have an M-series Mac here’s how to install macOS from a bootable installer. As we mentioned above, you can’t install a macOS older than Big Sur on an Apple Silicon Mac.
Plug in your bootable installer
Turn off your Mac.
Press the power button to turn on the Mac – but keep it pressed until you see the startup options window including your bootable volume.
Choose the bootable installer volume.
Click Continue.
The macOS installer should open – when it does follow the onscreen instructions to do the clean install.
If you have an Intel-powered Mac here’s how to install macOS from a bootable installer:
Plug in your bootable installer
Turn off your Mac.
Press and hold Option/Alt while the Mac starts up – keep pressing the key until you see a screen showing the bootable volume.
Choose the bootable installer volume.
Click Continue.
Select Install macOS from the Utilities window that appears.
Click Continue.
Now follow the onscreen instructions to do your clean install.
Cleaning and Data Recovery Software, Mac, MacOS, Personal Software