Living with(out) notarization

When Apple introduced notarization six years ago, it warned us that it would eventually become obligatory for developers, and reassured us that we would still be able to run our own apps that aren’t notarized. macOS Sequoia is the first version of macOS to expect apps delivered from outside the App Store to be notarized, but still to allow us to run apps that aren’t. This article explains how that’s accomplished, and what you should do to work within these new rules.
Sequoia’s rules
When an app is being launched for the first time on that Mac, if it has been put into quarantine with a quarantine extended attribute, Gatekeeper will check whether it has been notarized. If it has, then its launch will progress to further checks such as those of XProtect. If it hasn’t been notarized, then macOS will warn you of that, and halt its launch.
If you want to launch the app despite that warning, open Privacy & Security settings, where you can click the button to Open Anyway.
You will then be warned again, and given the advice “don’t open this unless you are certain it is from a trustworthy source.”
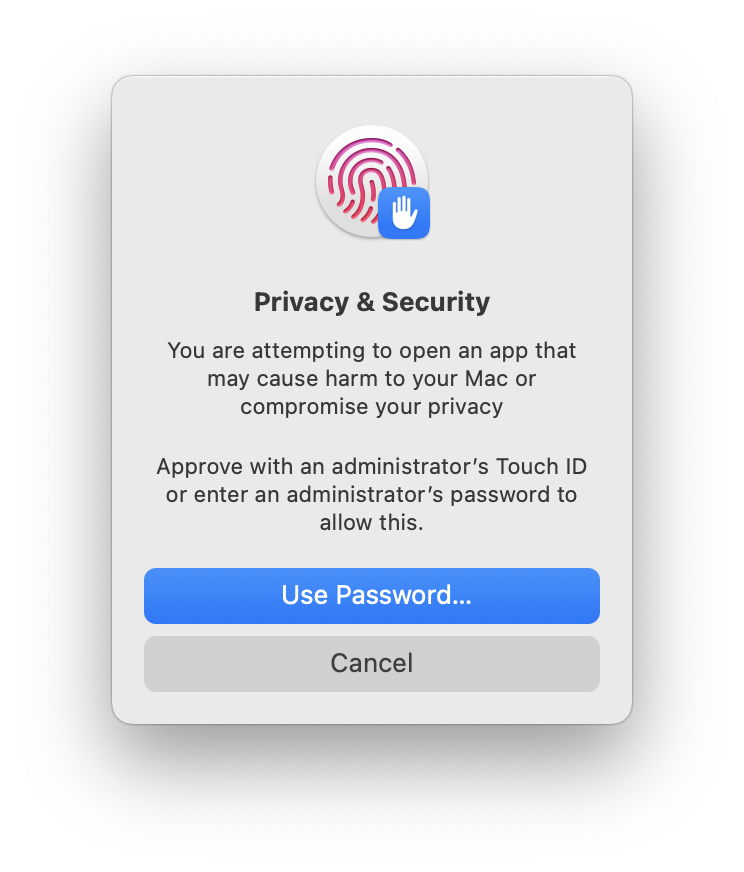
Clicking Open Anyway then takes you to the third dialog, where you’ll need to authenticate to launch the app.
Why all the dialogs?
The old Finder bypass for Gatekeeper was simple: use the contextual menu to Open the app, and there’s a single dialog to get through. That’s so simple that it has become widely used by malware.
These are the helpful instructions provided by one of the most widely encountered malicious apps, Atomic Stealer, when you mount its disk image. The invitation is hard to refuse unless you know the trouble it will bring. Detailing the new bypass system is going to prove a real challenge to those intent on delivering us their malicious apps.
How to run your own apps
The best way to avoid getting embroiled in this process is to build your own apps locally. All modern build systems such as Xcode and its tools now apply an ad-hoc signature to the app or command tool, but their products aren’t put into quarantine. Starting with the source code gives you the opportunity to satisfy yourself that the code hasn’t been tampered with, or is malicious. You may also be able to verify checksums or hashes to provide additional reassurance.
Using pre-built apps and tools brings significant risk. Supply-chain attacks are increasingly common, so even if you’re prepared to trust the source of the app, they may be unaware that it has been tampered with. Remember that, in security terms, there’s no robust way to tell the difference between a benign app and malware unless it has been notarized.
How to move apps between Macs
One of AirDrop’s annoyances is that everything transferred so conveniently also acquires a quarantine extended attribute, so putting it through full Gatekeeper first run checks on notarization. This isn’t just done to annoy, but allows for the fact that AirDropped apps can come from untrusted sources.
If, instead of using AirDrop, you use local file sharing, no quarantine extended attribute is added, and your unnotarized app won’t be put through a full first run check, so you won’t have to suffer the dance of the three dialogs before it will launch.
If you have access to a Developer ID and need to distribute an app more widely, you can notarize other developers’ apps. Apple has made it clear that submission of an app for notarization doesn’t have to be performed by its developer, the owner of the certificate used to sign the app with, but anyone with a current developer account with Apple can do so provided they follow the correct process. This is most appropriate for those in enterprise and organisations who need to use third-party products that aren’t yet notarized by their developer.
Tricks to avoid
You can of course strip the quarantine extended attribute before trying to run an app for the first time. This is a potentially dangerous workaround, as it bypasses first run checks that could spot malware. For those of us who often transfer our own apps for testing using AirDrop, it’s easy to drop them into a folder, Zip that, then on the recipient Mac strip the quarantine xattr before unZipping the archive. My utility Cormorant can make that even simpler. If you were to opt to do that, you must be absolutely certain of the provenance of the app you’re transferring.
For those who have test systems that frequently need to run unnotarized apps, another potential solution has been to disable Gatekeeper on them. Perhaps anticipating a move to do that, Apple has changed how this can be done, making it a two-step procedure, in which you first allow the disabling of checks, then in Privacy & Security settings control how that’s implemented. Apple encourages those who need to do this to use installed profiles instead, or handle it through MDM payloads. This has been explored in detail by Brandon Dalton in his account of these changes.
Is notarization worth it?
In terms of risk alone, only ever running code on your Mac that has been signed by Apple (all macOS code, all App Store apps) or has been notarized by Apple, is almost the safest policy (after running only those apps bundled with macOS). In the early years of notarization, a handful of malicious apps did manage to get notarized for a brief time, but it has been a good while since the last of those. The highest risk strategy is to ignore notarization completely, as it allows all malware to run freely.
There has been a lot of misinformation as to how notarization does or doesn’t work. It’s a key part of Apple’s switch from relying on the chain of trust in code signatures to assessing executable code using its CDHashes. Every notarized app is associated with CDHashes that can verify the integrity of its code, and can be compared against those obtained during the notarization process. This allows Apple to divide code into one of three classes:
known good, gathered from notarization,
known bad, discovered in malicious code in the wild,
unknown, found in code that hasn’t been notarized, or found in known malware.
If all the code that your Mac runs is in the first category, or signed by Apple, then it’s at lowest risk. What you should aim for is to ensure that any code in the third category can’t turn out to be malicious.


