Migrating to a new Mac, and claiming Time Machine backups

Over the last few years, Migration Manager in macOS has improved considerably, and when used wisely it can save you a great deal of time getting you new Mac up and running. This article explains how you can use it in Sequoia, and how that works with Time Machine and the backups from your old Mac.
There are two occasions when you can transfer your apps, settings and documents using the process of migration: during the initial personalisation and configuration of macOS, or using Migration Assistant at any time later. I always used to postpone that until macOS was set up and brought up to date, but lately I’ve preferred to get this over with first.
This time I faced a more difficult problem: I was replacing my old Mac Studio M1 Max with my new Mac mini M4 Pro, both of which are intended to use my single Studio display. While I could have run one of them headless (without a display connected), Migration Assistant expects both Macs to be used interactively, which would have required some cunning juggling. Instead of opting to connect them back-to-back, I therefore chose to migrate during initial setup from the Studio’s last Time Machine backup. As the backup storage for my Studio was a Thunderbolt 3 external SSD, this proved surprisingly quick.
Migration during setup
Before unboxing your new or previously owned Mac, prepare the source for migration, and any cable required to connect that Mac with the source. Migrating from a backup is here one of the simplest and fastest options, as all you need do is move your old Mac’s external backup storage over to the new Mac.
In the past, migration used the fastest connection available between two Macs that were connected back-to-back, but Apple’s current support note now states that Wi-Fi will be used. In my case, given that both Macs have 10 GbE, that could have been a disappointment if they were already connected by Ethernet cable.
Another important step is ensuring that your new Mac has a keyboard and mouse/trackpad. As I was moving those from my Studio, I connected both to the new Mac mini by their charging leads to ensure they’d work and pair correctly.
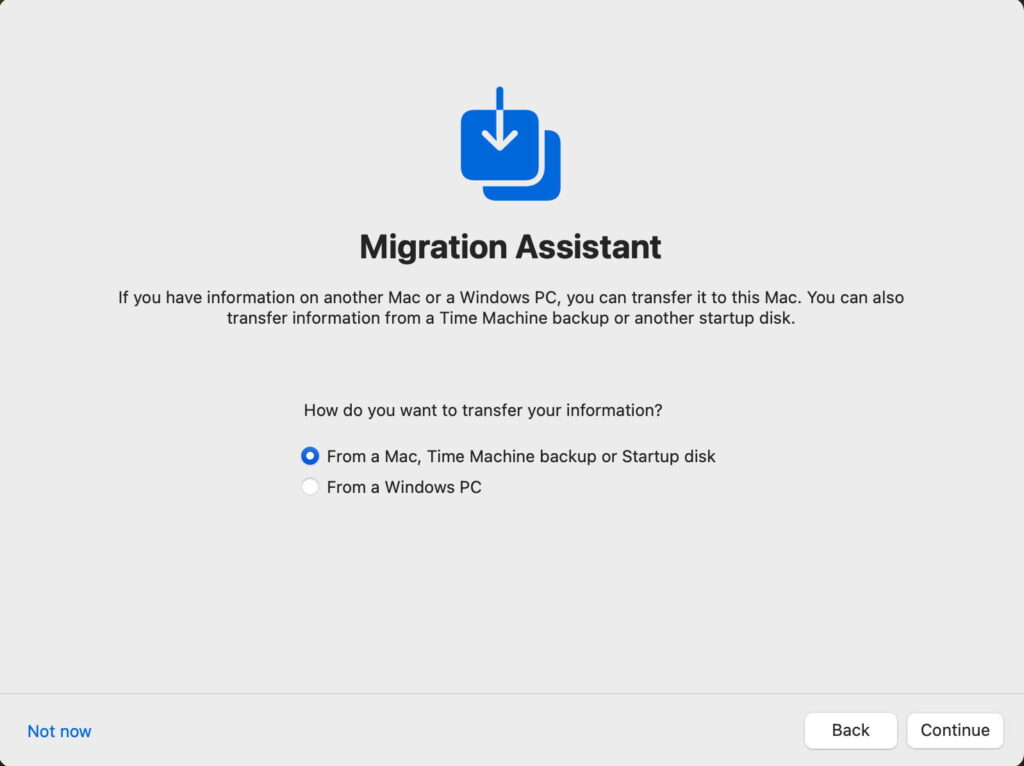
Unbox your Mac, connect it up to your migration source, its new keyboard and mouse/trackpad, then start it up. When the setup sequence reaches the Migration Assistant screen, select the migration source.
If you’re migrating directly from your old Mac, at this point you’ll need to open Migration Assistant on that Mac and set it to migrate to another Mac. Follow the prompts to continue the process.
Migration after setup
Initiate this by running Migration Assistant in /Applications/Utilities, and follow its prompts to select and connect to the source as above.
Time Machine backups
Assuming that your old Mac made Time Machine backups, and you want your new Mac to continue doing so, now’s the time to connect that backup storage, if it wasn’t already used as the migration source. When you do, you’ll be offered two options, to claim the existing backups for the new Mac, or to leave them for the old one.
You should see this dialog if:
you have migrated settings from an old Mac to this one,
you have migrated settings from a Time Machine backup of another Mac to this one,
you cloned the boot volume group used to start up your Mac,
your Mac’s logic board has been replaced.
If you claim the existing backups for your new Mac, then they’ll be used as part of its backup history, but you won’t be able to use them with the old Mac. You may prefer to leave those old backups as they are, and gradually delete them to free up space. Provided that you create the new backup volume for your Mac in the same container, old and new backups will share the same free space on your backup storage.
This apparently replaces the old tmutil inheritbackup command, which no longer appears to work with backups to APFS.


