Create and use virtual machines on Apple silicon Macs

When you’ve decided that the only way to do what you need is inside a virtual machine (VM), working out how to accomplish that might appear challenging. Because all macOS virtualisers on Apple silicon Macs use features built into macOS, they’re also similar in use. This article explains how to get started.
VMs for macOS on Apple silicon Macs consist of a bundle folder, containing key files often named:
Disk.img or [name].hdd, the bootable virtual disk image, typically about 7 GB larger than the space allocated to the boot disk, stored in sparse file format, so taking far less space on the host’s storage;
MachineIdentifier or macid.bin, 68 bytes or so containing the unique ID for the VM;
HardwareModel or machw.bin, around 150 bytes;
AuxiliaryStorage or aux.bin, around 33 MB containing private data.
Some virtualisers also store a property list or other files such as config.pvs and VmInfo.pvi containing settings for the VM.
Location
Even a small, basic VM requires more than 40 GB of storage space. If it’s kept in a location that’s backed up by Time Machine or a third-party equivalent, it may quickly fill those backups. At the very least, a folder containing VMs should be excluded from normal backups, and perhaps copied to separate storage once a day.
VMs will also be included in any snapshots made of that volume. To avoid that penalty, they should be stored in their own volume that doesn’t have snapshots made of it, as well as being excluded from normal backups.
Download IPSW file
VMs are built from the complete image of an Apple silicon Mac boot disk provided in an IPSW file, currently around 16.5 GB but significantly smaller in older versions. Those should only be downloaded from Apple’s servers. Several sites provide links to those, including Mr. Macintosh, who also includes most beta-releases.
Most virtualisers also give direct access to the current release of macOS in its IPSW file, as that’s a feature provided by the API.
Create a VM
In this phase, the VM bundle folder is created with a unique MachineIdentifier, and the contents of the IPSW file are installed into the disk image. The latter is usually fastest from a file in the same volume, and some virtualisers follow Apple’s example of moving the IPSW inside the bundle to perform that, rather than copying it there and deleting that copy once the VM has been created.
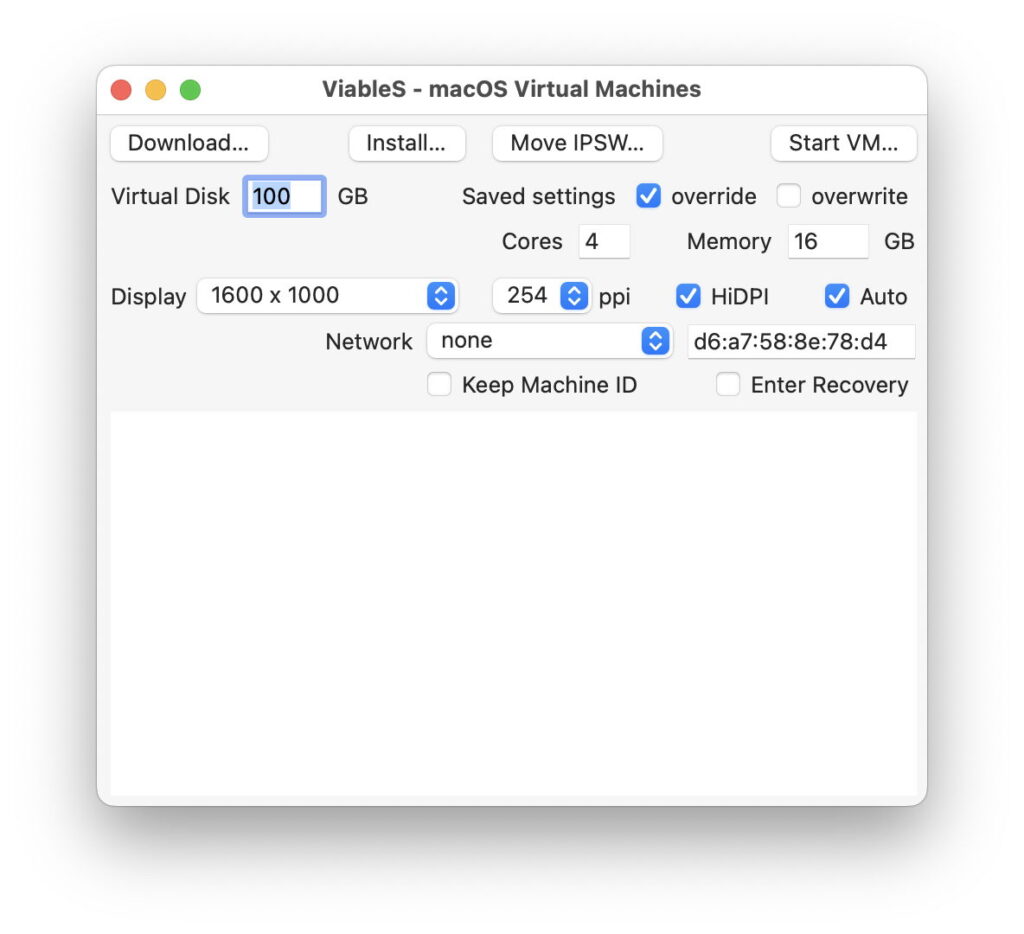
The only control for this stage is to set the size of the disk image in Disk.img. As that’s stored as a sparse file, it’s wise not to skimp and end up with a VM that can’t update itself, for example. For recent macOS, a prudent minimum is 50 GB, and 100 GB gives ample room for the VM to contain additional apps, and for a functional Home folder.
At the end of this phase, the new VM is bootable, and ready for its first run, during which macOS will be personalised and the VM configured. Some virtualisers proceed directly to that first run, in which case their initial settings for it will then be used to run macOS.
First run
This follows the same sequence as the first run on a brand new Mac that has just been unboxed, starting with language and keyboard localisation, passing through migration and Apple Account, and ending in the running VM.
Migration during initial setup isn’t possible, as the VM has no access to any host storage, and if run later faces similar challenges. Although you may enable Location Services, VMs appear unable to use them, possibly because of their inability to use Wi-Fi settings. One of the first checks to perform in a new VM is to switch Time Zone selection to manual and set the correct zone.
Apple Account and iCloud access only work in Sequoia guests running on Sequoia hosts, and will fail for all other combinations.
As with other runs of a VM, you get to choose how many virtual CPU cores it will use, how much memory it will be allocated, display, network and other settings. Those aren’t built into the VM in the way that its size is, although some virtualisers let you save a VM’s settings as its default.
Traditionally, like Macs, VMs have been quitted by shutting them down, but most virtualisers also let you close a VM in a suspended state.
Virtual resources
All virtualisers should offer you a free choice of the number of virtual CPU cores, memory, network connections, and possibly display options. GPU access can’t be controlled directly, though.
Although it’s possible to run a VM in just a single CPU core, that’s slow and incapable of anything useful. In practice a minimum of 3 is wise, and using substantial apps is better with 4-6. Those must be balanced against the need for cores by the host. Similar considerations apply to memory, where 8 GB is barely sufficient, and 16 GB preferable.
Virtualisers should offer bridged networking, giving the VM its own IP address rather than sharing the host’s using NAT.
Enhanced features
VMs running older versions of macOS have more limited features. One simple way to enrich a VM is to run it through Screen Sharing, either locally on the same Mac, or if you prefer over a local network. This can add features such as:
Drag and drop files between Finder windows in the VM and those on the host, to copy them.
Full support for ISO keyboard layouts, including the key at the left of the numbers row..
A shared clipboard for copy and paste between the VM and the host.
Standard key shortcuts to make screenshots of windows or the virtual display.
Trackpad controls including gestures and smooth action with all guests.
The only time that you should never use this is when you’re going to update macOS in the VM. That will disconnect Screen Sharing and could lead to problems during or after the update.
One-off runs
One of the common purposes of VMs is to run quick tests whose effects you don’t want to be permanent. One method of doing this is to maintain a collection of VMs with different versions of macOS installed. When you want to test one out, duplicate that VM in the Finder (Command-D), run the copy, then when you’ve finished with it, delete it. Because duplicating the VM in the same volume results in file cloning, this is almost instant, and uses relatively little real storage space, while preserving the original.
This is also a useful technique when you want to test a potentially destructive process, as you can make as many duplicates of the original as you want. The only caution is that duplicated VMs have identical MachineIdentifiers, and you should never try running two VMs with the same MachineIdentifier at the same time.
Isolating VMs
One excellent reason for using a VM is to study potentially malicious software, and defences against it. It’s relatively easy to lock a VM down and ensure it’s completely isolated from the host, except in the limited data exchanged between its Virtio drivers.
To prepare a VM for use in isolation, start with a regular VM built using the version of macOS to be used in tests. Duplicate that, and running it with shared folders, load it up with any software to be used during the tests. Shut the VM down, and open it in Recovery mode to change its security, disable SIP and customise it in any other way you require, then shut it down again.
Open that VM using ViableS, deciding then whether you want it to have a network connection. That VM is then running in a sandbox, with no shared folders, and as isolated from the host as possible.
Settings and Vimy
Once you have set a VM up, you may want to run it using the same settings and with a minimum of fuss. My free Vimy runs VMs configured using Viable from a double-click, with a minimum of overhead; Vimy itself uses less than 50 MB of memory. That uses a property list containing settings such as the number of virtual CPU cores and memory, saved inside the VM bundle folder.
Further information
Virtualisation on this site.
