Browse your Mac’s log with LogUI
If you ever need to understand what’s going on in your Mac, reading its log is essential. However much you might stare at Activity Monitor, read source code or disassemble components of macOS, what you can see in the log tells you what has really happened. Whether it’s a bug or an unexpected event, it’s the only way to look back and discover what went on.
For most, Console isn’t the right tool. It only offers the options of viewing its live stream, or making an archive of the whole log and wading through that when you need to look at an event in the past. Although my log browser Ulbow gives much better access, for many it’s still a daunting task. I’ve now switched almost entirely to using my new lightweight log browser, LogUI, and here explain how you can use it. Although it’s currently an early release with limited features, you should find it ideal for getting started.
LogUI 1.0 build 27 is available from here: logui127
This comes as a Zip archive, so unZip it, and move the LogUI app to another folder before running it for the first time; your main Applications folder is fine, and almost anywhere will do nicely. Alongside it is a copy of the PDF Help file that’s also inside the app, so you can refer to it when you’re not running LogUI. As the two are identical, you can trash the separate copy if you’re happy to use that inside the app.
Before opening LogUI, generate an event that you can examine in the log. One starter might be launching an app. Try to do this when your Mac is otherwise quiet and unoccupied: if Activity Monitor shows it’s busy with lots of background tasks, then the log could be filling with noise, when what you want most is peace. For the sake of simplicity, time this on an even minute, and make a mental note of that time to the second.
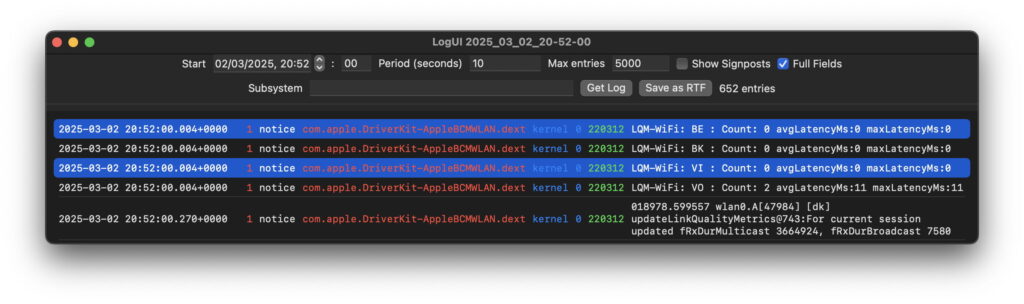
As soon as you’ve done that, open LogUI and you’ll be greeted by its window, with its toolbar ready for you to set up and get your first log extract. That should be set as follows:
Start to the current date, hour and minutes. As those are set to the time you open the window, they should already be close to the time of the event. Just after the stepper control is the seconds setting. If the event occurred a moment after the seconds changed to 00, that makes a convenient time to start your log extract.
Period set to around 5 seconds. This value can be floating point decimal, so might be 2.5 seconds for a smaller log extract.
Max entries set to 1000 to start with.
Show Signposts not ticked.
Full Fields ticked.
Subsystem empty.
Then click on Get Log to see the log extract for that period.
In my case, a five second period overfilled the 1000 I had set in Max entries. Scrolling to the foot of the extract showed that had been reached in less than two seconds, so I increased Max entries to 10000 and clicked Get Log again.
There are now over 5,000 entries in the extract, but they scroll smoothly enough to let me look around them.
The best way of reducing the number of entries to make them more understandable is to add a Subsystem as a filter. In this case, as I’ve launched an app, I can get most useful information from LaunchServices, by entering
com.apple.launchservices
into Subsystem. I also reduce the number of fields shown by unticking the Full Fields box, letting me concentrate on the messages. You can toggle Full Fields without having to get log entries again, as it only affects the fields within those entries that are shown in the window. Then click on Get Log again.
Scrolling down through the 358 entries remaining, I quickly reach one with a message field reading
LAUNCH: translocate to <private> from <private>
Although we could do without the privacy censorship here, it’s easy to work out that the app I just launched underwent app translocation, and that’s confirmed a little further down when LaunchServices gives its full path.
If you want a copy of the text from one or more selected entries, use the Copy command (Command-C), then paste it into any text editor. That doesn’t copy all the fields, only those you’re most likely to need elsewhere. For a full copy of that log extract, with colours indicating the fields, click on the Save as RTF button. As with LogUI’s window title, saved files are given default file names containing the start time of that log extract to help you keep them in good order.
This is the same log extract seen in my rich text editor DelightEd.
Finally, open LogUI’s Settings to enter the defaults you want its windows to open with. These match controls in its toolbar. The last of those, Light Mode, enables you to run the whole app in Light Mode if you prefer. For that to work, your Mac will also need to be in Light Mode, and you should tick that box, close the Settings window and quit the app. When you next open it, it should operate in Light Mode. Other changes made to Settings don’t need you to quit the app for them to take effect.
Enjoy!


