How to expertly configure and fine-tune your MacBook Pro’s display
[ad_1]
Apple’s new 14- and 16-inch MacBook Pro are made for professionals whose work puts extra demands on a computer. A lot of that work involves content that that needs to match a specific color space. To address those needs, Apple includes color reference modes that work with the MacBook Pro’s Liquid Retina XDR display.
How to set a reference mode
Here is how to switch the color profile of the MacBook Pro’s display to a reference mode.
1. Open System Preferences and click on Displays.
2. In the Displays system preference, look for the Presets setting. Click the pop-up menu next to it.
3. Select the profile that suits your needs.
4. Exit System Preferences.
IDG
How to use your own color profile
You can use your own color profile or create one for the MacBook Pro. Here’s how.
1. Open System Preferences and click on Displays.
2. In the Displays system preference, look for the Presets setting. Click the pop-up menu next to it.
3. In the pop-up menu, select Customize Presets.
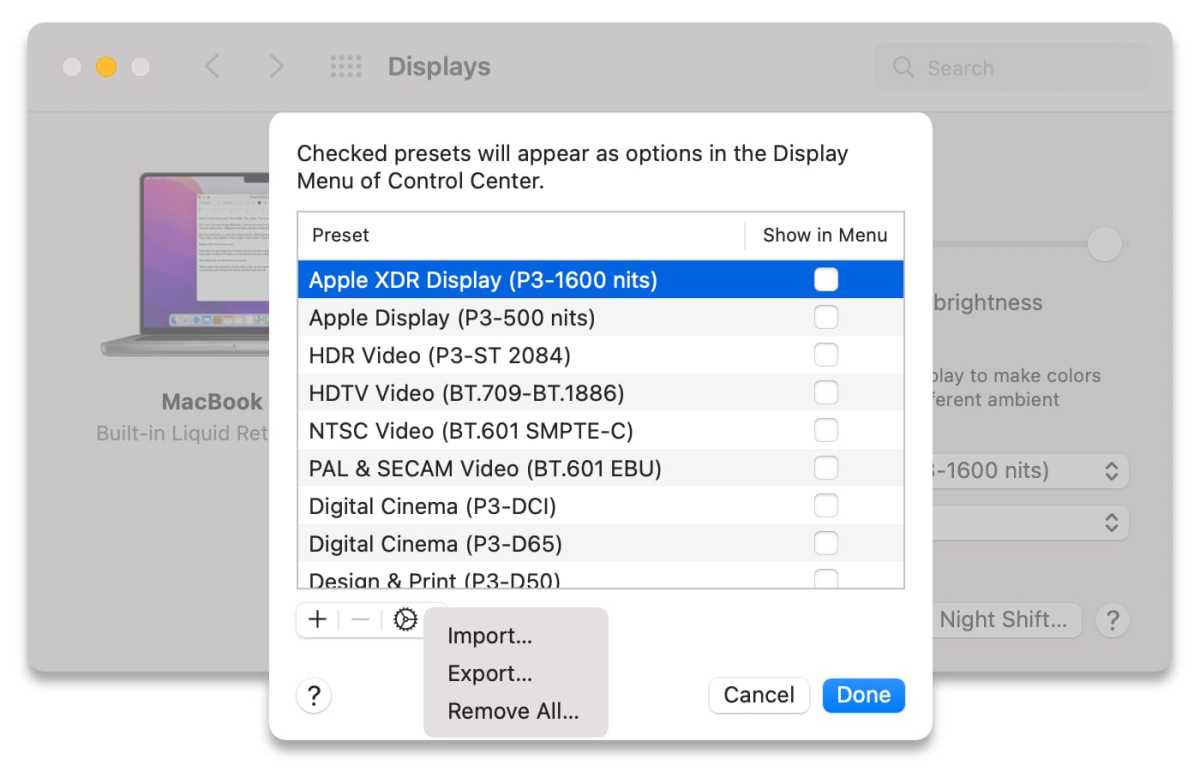
4. If you have a profile ready to use, click the gear icon near the bottom of the window that appears. Select Import to use your profile. (You can also select a profile and export it if you want to use it on a different display.)

IDG
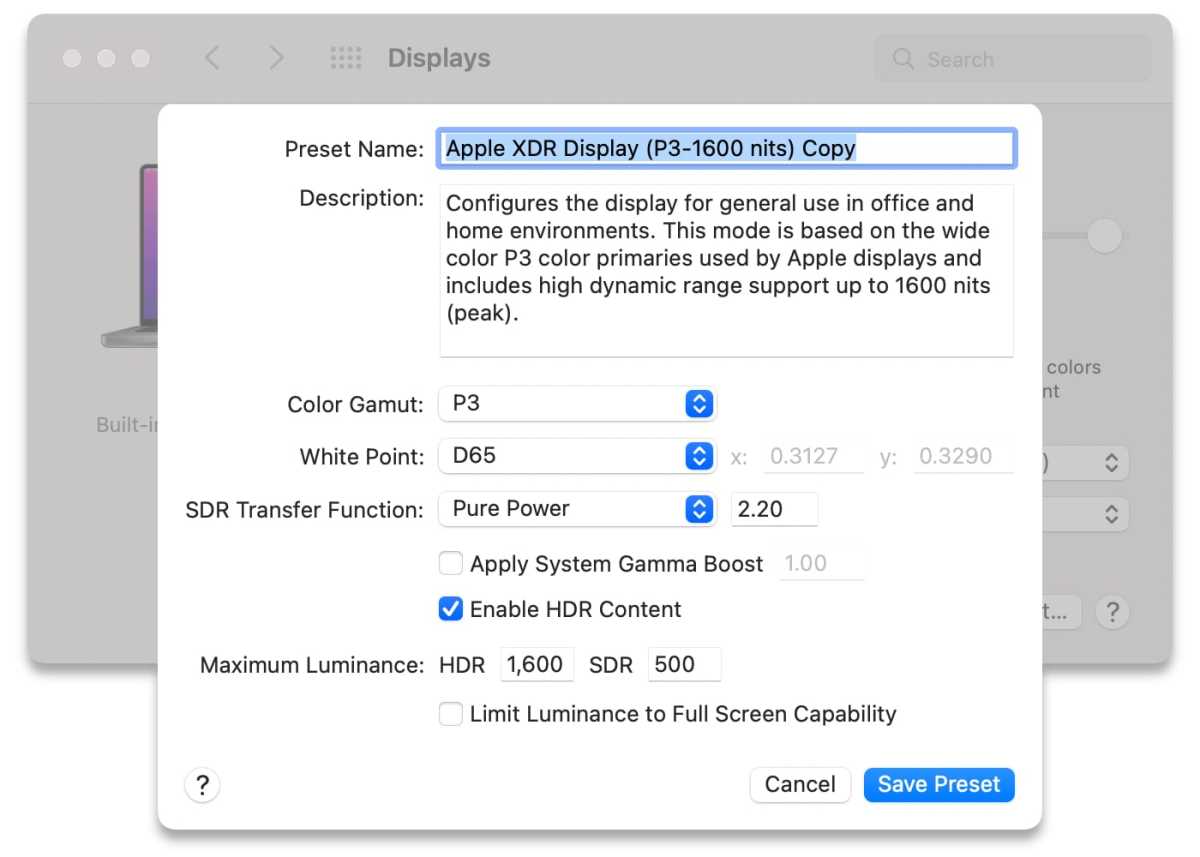
5. Apple also lets you create a custom profile. Click on the + button, and then you can make a profile. You can set the Color Gamut, White Point, SDR Transfer Function, and Maximum Luminance. Give your profile a name and click Save Preset when you’re done.

IDG
6. Exit System Preferences.
How to set your favorite profiles
You set which reference modes appear in Displays preferences and the AirPlay menu. Here’s how.
1. Open System Preferences and click on Displays.
2. In the Displays system preference, look for the Presets setting. Click the pop-up menu next to it.
3. In the pop-up menu, select Customize Presets.
4. In the list of profiles, there is a column called Show in Menu (see above screenshot). Check the boxes for your favorite profiles. Click Done.
5. Exit System Preferences.
Roman has covered technology since the early 1990s. His career started at MacUser, and he’s worked for MacAddict, Mac|Life, and TechTV.
[ad_2]
Source link


