How to check for an unwanted account connected to your Apple ID

It can be nearly the worst sensation to have–a creeping dread that an unknown person has entered the room you’re in, who you can’t see. When you turn around, there’s nobody there. But it’s even worse when you turn around and there is someone there. This can happen with your online life when you have an account hijacked, potentially silently, and parties known or unknown to you are rifling through your data or monitoring you.
An Apple ID is no exception. But you can track both principal threats (other devices and logins) and secondary ones (apps and other services) sharing access. You should check which devices and phone numbers are associated with your Apple ID and then do a general audit with Safety Check, introduced in September 2022.
Check for unwanted devices
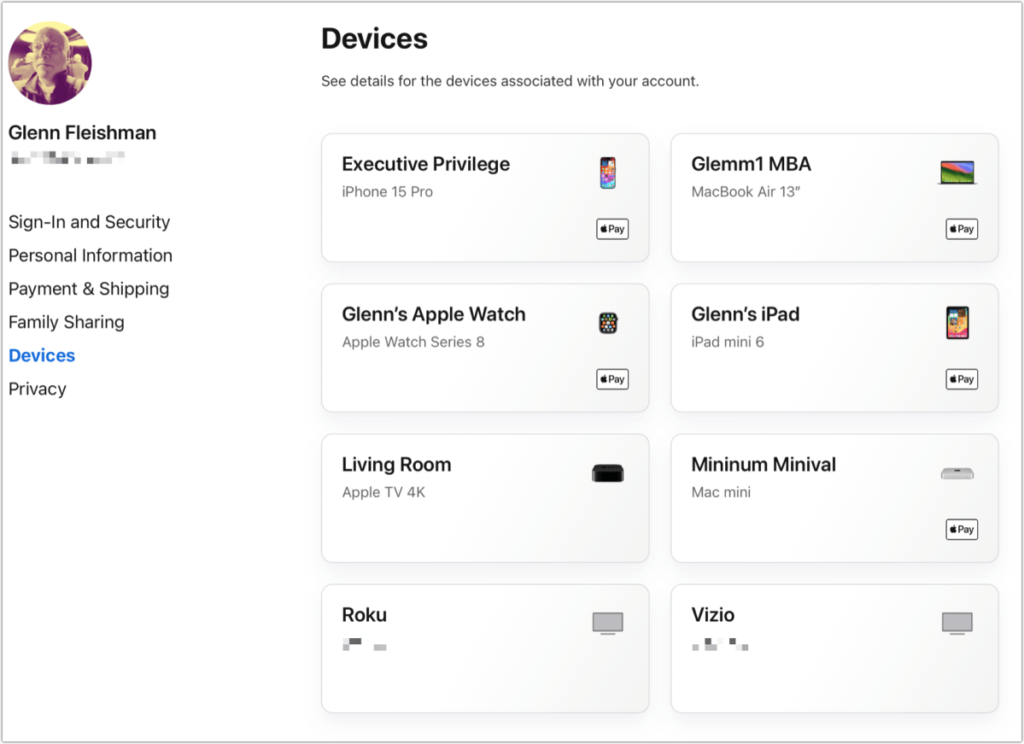
To view a list of devices that Apple considers logged in and trusted for your Apple ID account, do one of the following:
At the Apple ID website, log in and click Devices.
In iOS/iPadOS, go to Settings > Account Name and swipe down.
In macOS 13 Ventura or later, go to > System Settings > Account Name and scroll down.
If you see a device you don’t recognize:
Take a screen capture or photo of it in the list, then click or tap on it, and take a screen capture or photo of its information, including its serial number. This may help you if you need to consult a lawyer or law enforcement.
Click or tap Remove from Account and confirm its removal.
This device is no longer considered a trusted device for the purposes of logging in to your Apple ID account and can no longer access new information synced via iCloud services. However, it may retain any information that was downloaded or cached locally.
Check that you recognize every device logged into your Apple ID account.
Foundry
Check for unwanted phone numbers
Apple relies on phone numbers you add during setup or change later to give you additional ways to verify account access if you can’t get to a trusted device or have other account issues. You can check on these trusted numbers; if you don’t recognize a phone number, make screen captures or take photos and make a note. In each of the above places, you can remove an unwanted number.
Here’s how to find the numbers and remove them:
At the Apple ID website, log in and click Sign-In and Security, and then click Account Security. Trusted phone numbers appear at the top of the list. Click the minus sign to remove a number and click Remove to confirm.
In iOS 17/iPadOS 17, go to Settings > Account Name > Sign-In & Security > Two-Factor Authentication. (It appears one level higher in earlier versions of iOS/iPadOS.) Tap Edit, then tap the delete icon, and confirm.
In macOS 13 Ventura, go to System Settings > Account Name > Password/Sign-In & Security; in macOS 14 Sonoma, also click Two-Factor Authentication. Select the number and tap the minus sign at the bottom of the Trusted Phone Numbers section.
Trusted phone numbers can verify a log in to your account—dangerous when you don’t recognize the number.
Foundry
Perform a Safety Check
Starting in iOS 16, you can use a new privacy and safety feature called Safety Check. It’s designed to help people who are victims of stalking, intimate partner violence, and similar situations determine whether they are being monitored by or connected to anyone they don’t want to be, and remedy that situation. It also has additional safety pathways built in, as well as advice on contacting real-world resources for help.
Safety Check provides a quick and safety-preserving way to see with whom you’re sharing information or who has access to your location.
Foundry
Find the feature at Settings > Privacy & Security > Safety Check. Note that on every screen, there’s a Quick Exit link. Tap that, and it essentially force quits Settings instantly, both preventing someone from seeing what’s on your screen and not re-opening a path back to Safety Check if Settings is relaunched.
Apple provides two pathways: Emergency Reset, which essentially cuts your iPhone and Apple ID account off from everything else and lets you reset passwords; and Manage Sharing & Access, which offers a review of settings with options to change and restrict at each step.
Apple offers an extensive guide to this feature, worth consulting in preparation for using it to make sure you know what to look for and the outcome of engaging any of its options.
This Mac 911 article is in response to a question submitted by an anonymous Macworld reader.
Ask Mac 911
We’ve compiled a list of the questions we get asked most frequently, along with answers and links to columns: read our super FAQ to see if your question is covered. If not, we’re always looking for new problems to solve! Email yours to mac911@macworld.com, including screen captures as appropriate and whether you want your full name used. Not every question will be answered, we don’t reply to email, and we cannot provide direct troubleshooting advice.
Mac


